10 tips to extend Wi-Fi range and boost Wi-Fi signal
A sketchy connection can be infuriating, whether it’s interrupting a video call, important work, or a binge-watch of your favorite series. Learn how to extend your Wi-Fi range and boost the signal. Then, make sure your device is optimized to handle your new speedy Wi-Fi by using Norton Utilities Ultimate to clean and speed it up.
2025
PCMag
60X Winner


Limited Wi-Fi range can lead to dead spots or weak internet in areas of your home, no matter how expensive your internet plan is. Whether your connection is spotty because you’re too far away or have old equipment, there are some quick fixes to try, and also some that require a little more time.
Here are 10 tips on how to extend your Wi-Fi range, starting with the easiest, cost-free solutions.
Tip |
Time commitment |
Minimum cost |
|---|---|---|
1. Reposition your router |
5 minutes |
Free |
2. Update your router’s firmware |
5-10 minutes |
Free |
3. Switch to a different Wi-Fi band |
5-10 minutes |
Free |
4. Change the Wi-Fi channel |
5-10 minutes |
Free |
5. Get a Wi-Fi range extender |
10-30 minutes to set up |
$10 |
6. Get a mesh network |
30-60 minutes to set up |
$80 |
7. Add an antenna |
10-20 minutes to install |
$5 |
8. Add or replace your router |
20-40 minutes to set up |
$25 |
9. Get a powerline adapter |
20-40 minutes to set up |
$30 |
10. Add an access point |
Up to several hours |
$120 |
1. Reposition your router
Place your router in a clear, elevated space near the middle of your house to maximize its reach. Placing it near the ceiling can help with coverage if you have a two-story home. You could be blocking its reach if you hide it in a cabinet, behind large objects, or near brick walls or metal surfaces.
Also avoid placing any other devices that emit electromagnetic fields, such as microwaves, Bluetooth speakers, and baby monitors, nearby.

2. Update router firmware
Updating your router’s firmware can improve performance and security. Old firmware may impact your router’s stability and compatibility with connected devices. So, although installing updates won’t extend your Wi-Fi range past your router’s original capabilities, it might improve how your router manages connections.
Many modern routers receive firmware updates automatically, but older or lower-cost options might not. You can easily check for updates in your router’s admin settings, where you can also change advanced networking settings like enabling port forwarding.
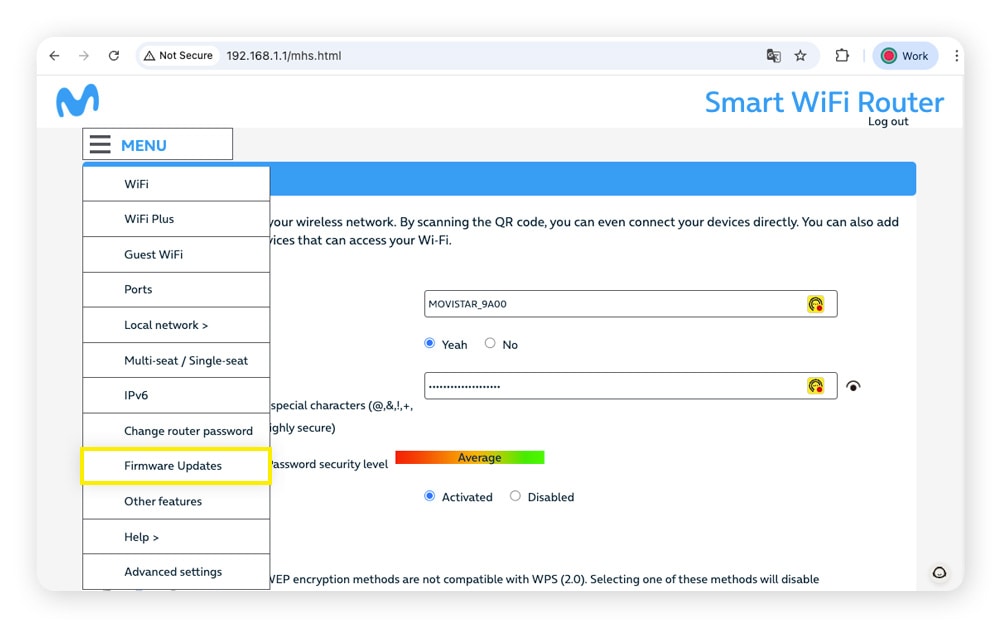
Here’s how to update your router’s firmware:
- Find your router’s IP address on the side of the device.
- Open a browser, type the IP address in the address bar, and hit enter.
- Log in to your router’s admin page using your router’s username and password (the default credentials are likely on your router).
- Go to the firmware updates page and check for updates.
Some internet service providers (ISPs) have apps that allow you to update your router’s settings more directly, so check if your ISP offers one for a more user-friendly experience.
3. Switch to a different Wi-Fi band
You can also switch to a different Wi-Fi band from your router’s settings. Dual-band routers use 2.4 and 5 gigahertz (GHz) Wi-Fi bands, while newer tri-band routers also support 6 GHz. Each band offers different benefits:
- 2.4 GHz: Longer range and better ability to pass through walls, but slower internet speeds and more interference from other household devices like microwaves.
- 5 GHz: Faster speeds and less interference, but a shorter range.
- 6 GHz: Fastest speeds and less congestion, but the shortest range.
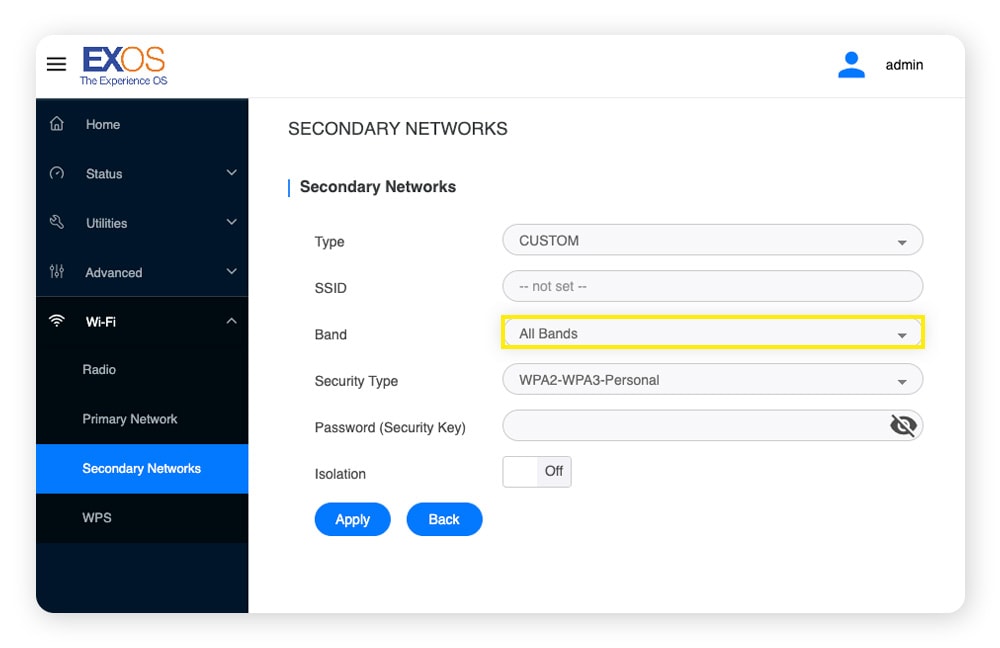
Here’s how to switch to a different Wi-Fi band:
- Open a browser, type the IP address in the address bar, and hit enter.
- Log in to your router’s admin page using your router’s username and password (the default credentials are likely on your router).
- Go to your router’s Wi-Fi network settings (sometimes called radio frequency settings).
- Turn on the bands you want active, and give each a unique SSID (network name) that includes the band GHz (so you know which to use for the next step).
- Reconnect your devices to the SSID that matches the band you want.
4. Change the Wi-Fi channel
Changing your Wi-Fi channel can improve performance by reducing interference. If nearby routers use the same channel, your connection can suffer from congestion, leading to slower speeds or signal drops. Channels divide each Wi-Fi band into numbered segments, which you can adjust in your router’s wireless settings.
Think of it this way: Wi-Fi bands are like highways, and channels are the lanes on that highway. If one lane is clogged with traffic, moving to another lane can make your trip smoother. So, changing channels can reduce interference and make it feel like your Wi-Fi range is greater.
Note that some routers don’t let you manually switch channels and will manage this automatically.
Follow these steps to see if you can change Wi-Fi channels:
- Open a browser, type the IP address in the address bar, and hit enter.
- Log in to your router’s admin page using your router’s username and password (the default credentials are likely on your router).
- Look for a section related to Wireless Settings, which might be on its own settings page or on your homepage.
- Select a channel from the dropdown menu.

Some of the best channels to use by band are:
- 2.4 GHz: Channels 1, 6, and 11.
- 5 GHz: Channels 36, 40, and 44.
- 6 GHz: Channels 37, 117, and 213.
5. Get a Wi-Fi range extender
Wi-Fi extenders capture and rebroadcast the signal from your router to extend its range. This can be especially useful if you have a large home, thick walls, or dead zones.
Place your Wi-Fi extender roughly halfway between your main router and where you need a stronger signal, so it’s within the router’s range. You should see faster internet and better ping speeds in the previously dead area. Just be careful about how many you use, as multiple Wi-Fi extenders can create overlapping signals and reduce performance.
When looking for an extender, be aware they may be advertised as a repeater or booster. While these products can work in different ways, manufacturers often use the terms interchangeably. Check the product description to ensure an extender will boost the signal enough for your needs.
6. Get a mesh network
Mesh networks extend your Wi-Fi range through a series of nodes you can spread throughout the house. Unlike traditional Wi-Fi extenders, mesh nodes don’t just repeat the signal — they communicate with each other to create a single, unified network, giving you stronger coverage and more stable connections. A mesh setup will often work where an extender won’t.
Mesh networks can experience interference from nearby IoT devices or Wi-Fi networks, so you may have to reposition the nodes to find the right setup. If you get it right, you should see a more consistent connection throughout your home.
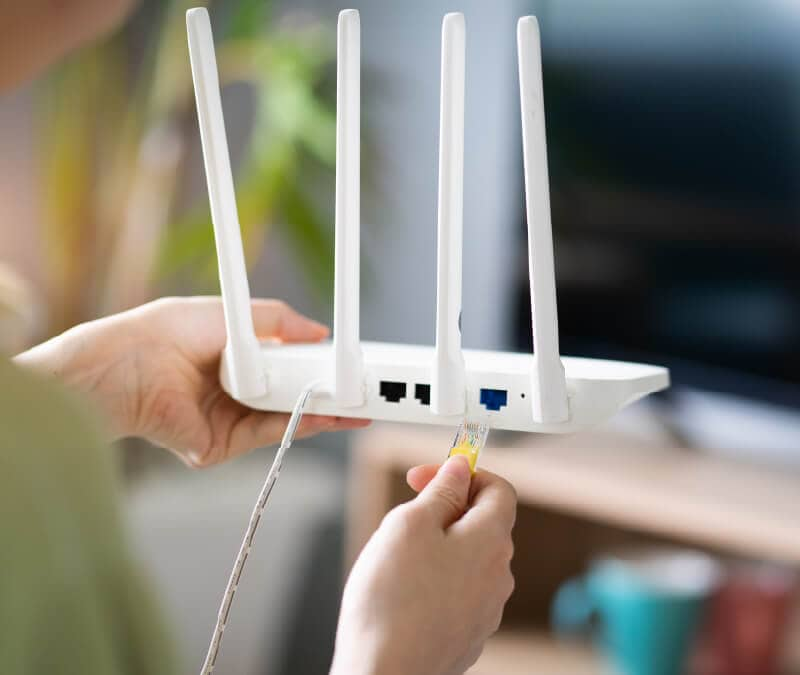
7. Replace an antenna
If your router has detachable antennas, replacing them can improve Wi-Fi coverage. Depending on your needs, you might benefit from a high-gain antenna. Unlike regular antennas that spread the signal in all directions, high-gain antennas focus Wi-Fi signals more strongly in one direction. This makes them especially useful if you have a long or narrow home.
8. Replace your router
Replacing damaged or older routers can improve your range by introducing newer, more efficient hardware to your network. Some signs that you may need to replace your router include frequent internet dropouts and overheating. Routers don’t have a standard lifespan, but if yours is over three years old and significantly underperforming, you may benefit from an upgrade.
When replacing your router, make sure it supports or exceeds the speeds included in your internet plan. If you rent your router from your ISP, they may provide replacements or upgrades as part of the plan. Otherwise, be sure to buy a router that’s fully compatible with your service.
9. Get a powerline adapter
A powerline adapter uses your home’s electrical wiring to extend your network connection. They’re especially useful if you have lots of rooms since they don’t rely on wireless range. This makes them more reliable for long distances, as long as your electrical wiring setup supports it.
To set it up, you’ll need at least two adapters:
- Plug one powerline adapter into an outlet near your router and connect it to the router with an Ethernet cable.
- Connect the second adapter to an electrical outlet where you want to extend coverage.
- Press the pair button on each adapter to connect them, if necessary.
10. Add an access point
To add an access point, you usually connect the device to your router using an Ethernet cable, then configure it to broadcast Wi-Fi. The access point creates a new Wi-Fi signal, allowing more devices to connect simultaneously and extending the range of your Wi-Fi where needed.
This is especially useful in large homes, offices, or multi-story buildings where a single router’s signal isn’t enough. However, the need to run an Ethernet cable from the router to the access point can be a downside, especially if it’s a long distance.
What to do if your Wi-Fi performance doesn’t improve
If you tried the steps above and performance doesn’t improve, you could have some general issues causing a weak Wi-Fi range. To try and improve it, start by removing unnecessary devices, restarting your router, and checking for Wi-Fi thieves.
Here’s a more detailed guide to steps you can take to try and improve your wireless performance:
- Remove unnecessary devices: Review your router’s admin console to find devices you aren’t using. Disconnecting them can improve your download speed and other specs for devices you actively use.
- Check for Wi-Fi thieves: Check your router’s admin settings for unrecognized devices. Remove these unwanted hitchhikers and update your Wi-Fi router password to help stop future invaders.
- Restart your router: Restarting your router can resolve temporary glitches, clear the memory, and re-establish connections.
- Check your plan: Internet service providers (ISPs) can throttle your data if you exceed your “soft” data cap. Review your data plan to see if it mentions a soft cap, and consider whether a better plan might solve your issues and improve your upload and download speeds.
- Check for malware: Use antivirus software to scan your devices for malware. Computer worms and other malware can slow down your network connection and hog valuable resources.
- Get a better VPN: Some virtual private networks (VPNs) can slow down your internet considerably more than others. To improve your network performance, consider looking for a fast and reliable VPN.
Are there any risks when extending your Wi-Fi range?
Adding extenders, mesh nodes, or access points means you have more devices that need to be secured. If these aren’t updated with the latest firmware or use WEP or WPA security protocols instead of the more secure WPA2 and WPA3 protocols, they could become entry points for attackers.
Extending your Wi-Fi signal could also mean it reaches outside your home, possibly making it easier for attackers to connect. Always use WPA2 or WPA3 encryption with strong passwords, and keep all your devices updated, to stay better protected.
Improve your computer and network performance
Poor internet performance isn’t always about your network. Sometimes, a sluggish device is the culprit. If a slow device is the reason for your slow internet, cleaning and optimizing can help you avoid frustration online and offline.
Improve your browsing experience with Norton Utilities Ultimate. This powerful app helps you clean up your phone or computer, streamline processes, and effortlessly uninstall junk using one easy tool.
FAQs
Will removing unwanted Wi-Fi devices or users improve my range?
No, removing devices from your home network will not extend your Wi-Fi’s range. However, fewer users on your network can improve general Wi-Fi performance by reducing bandwidth congestion.
How far can I extend my Wi-Fi range?
The maximum range you can extend your Wi-Fi to depends on factors like the frequency band, your router’s capabilities, and your home layout. On a 2.4 GHz band, Wi-Fi can often reach up to 100 feet indoors and 300 feet outdoors.
What’s the difference between Wi-Fi extenders and boosters?
Many manufacturers use these terms interchangeably. However, others commonly state that Wi-Fi extenders focus on extending your Wi-Fi range, while boosters help improve your Wi-Fi’s signal strength.
How do I extend my Wi-Fi range outside?
You can extend your Wi-Fi range outside by positioning your router at or near a window, where it can reach outdoors. You can also purchase outdoor Wi-Fi extenders built to withstand changing weather conditions.
How can I boost my Wi-Fi signal?
You can boost your Wi-Fi signal by installing a Wi-Fi booster (sometimes called an extender or repeater). This can boost your signal in areas with previously poor or no coverage.
Editorial note: Our articles provide educational information for you. Our offerings may not cover or protect against every type of crime, fraud, or threat we write about. Our goal is to increase awareness about Cyber Safety. Please review complete Terms during enrollment or setup. Remember that no one can prevent all identity theft or cybercrime, and that LifeLock does not monitor all transactions at all businesses. The Norton and LifeLock brands are part of Gen Digital Inc.
- 1. Reposition your router
- 2. Update router firmware
- 3. Switch to a different Wi-Fi band
- 4. Change the Wi-Fi channel
- 5. Get a Wi-Fi range extender
- 6. Get a mesh network
- 7. Replace an antenna
- 8. Replace your router
- 9. Get a powerline adapter
- 10. Add an access point
- What to do if your Wi-Fi performance doesn’t improve
- Are there any risks when extending your Wi-Fi range?
- Improve your computer and network performance
- FAQs


Want more?
Follow us for all the latest news, tips, and updates.