How to use a flash drive (Windows vs. Mac)
Flash drives are a pocket-sized tool for foolproof file backups, file transfers, and secure storage. Use them to keep your files, documents, and photos safe. Then, get ironclad online protection to help protect your digital assets, whether you’re on the go, if your computer crashes, or when some other situation arises.
2025
Best Antivirus Software
2025
Top Rated Product


What is a flash drive, and when should you use one?
A flash drive (aka a memory stick or thumb drive) is a portable device that plugs into your computer. These handy tools are great for work, school, and personal use. However, the steps to using flash drives vary depending on your device and its operating system.
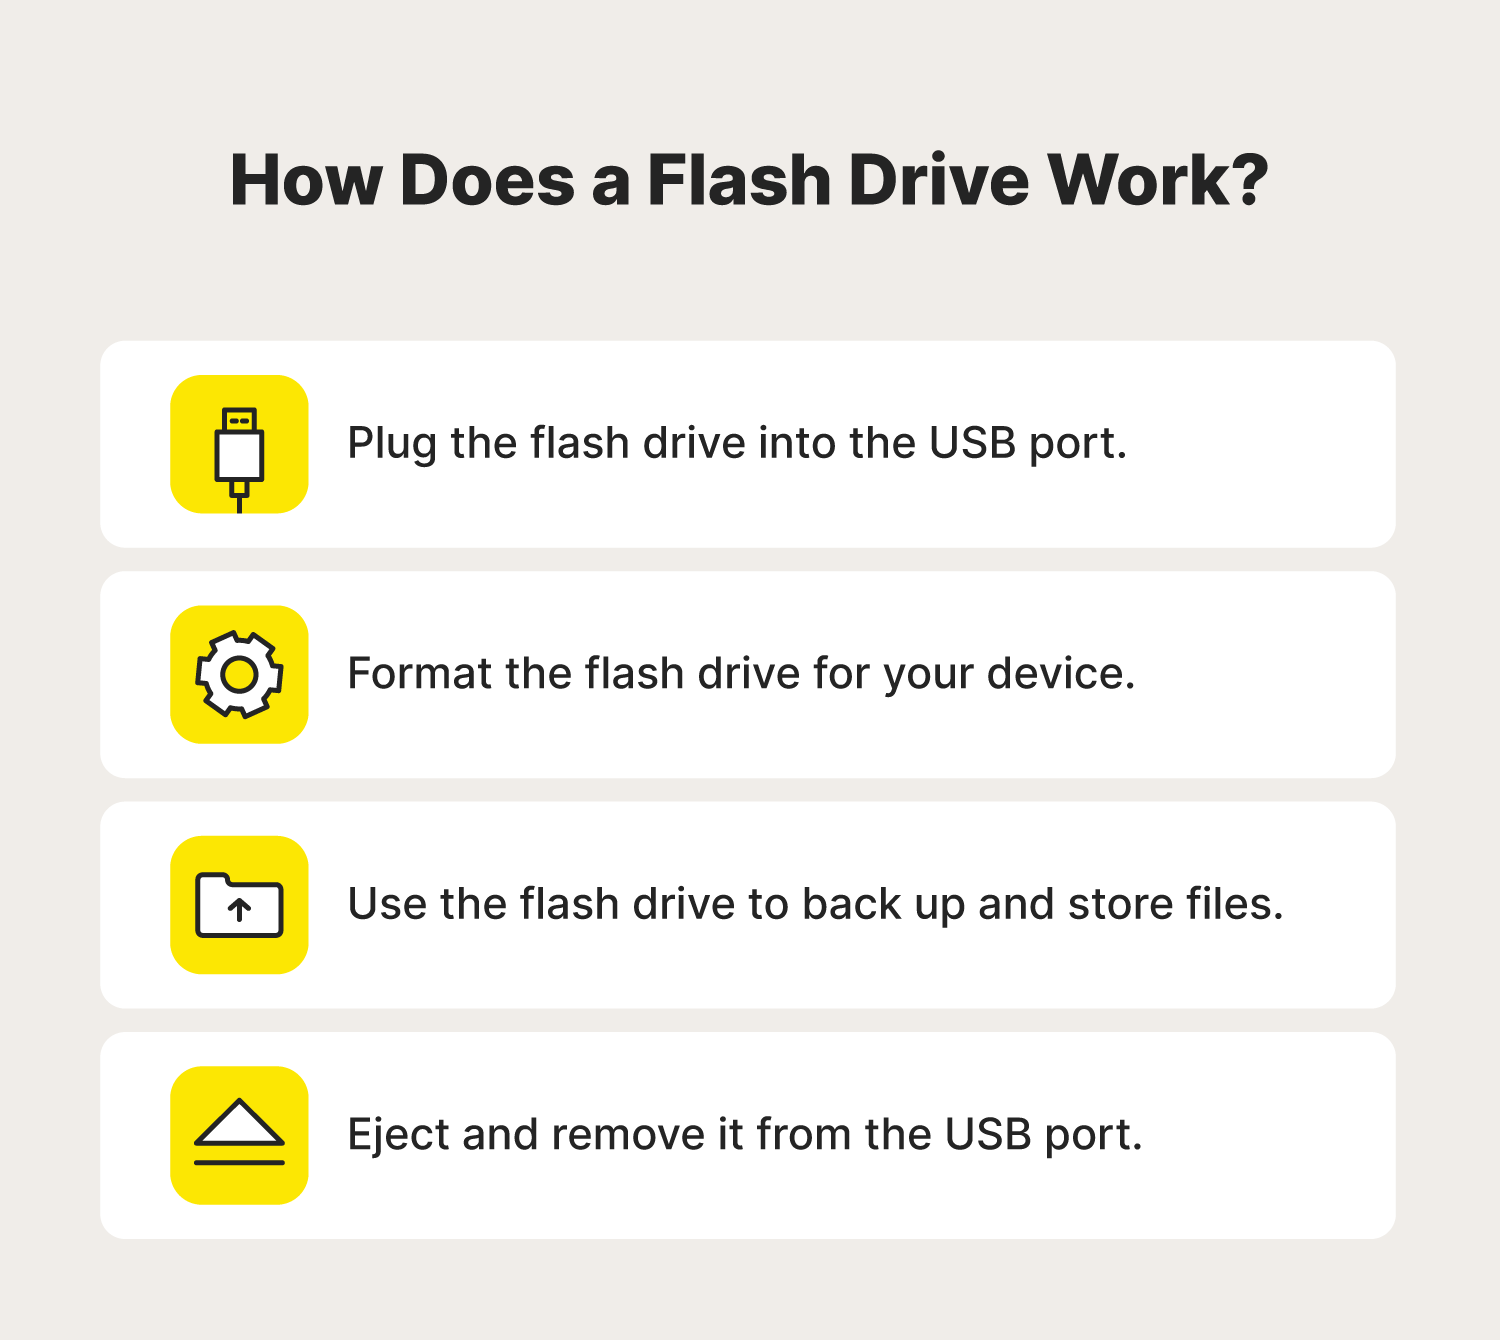
Once your computer recognizes the device, you can use it to:
- Back up data
- Free up device storage space
- Access data offline
- Transfer files to other devices
How to use a flash drive on a Mac
Apple makes it a breeze to use flash drives on Mac devices. Below, we’ll show you how to connect and format a flash drive, manage its files, and eject it when you’re done.
How to connect a flash drive on Mac
You need to connect the flash drive properly before you can do anything else. Here’s how to get started:
- Locate the USB port on the side of your computer.
You can find this on the side of MacBooks (laptops) or the back of iMacs (desktop computers).
- Get an adapter if needed.
Most modern Mac computers use different USB port types like the USB-C (a small, reversible, oval-shaped connector with no specific vertical orientation) or a Thunderbolt 3 port (a higher-powered but identical version of the USB-C).
You’ll need an adapter with modern Macs because most flash drives need a standard USB-A port (a rectangular connector with a wider end for the computer and a narrower end for the thumb drive). - Plug in the flash drive.
Remove the protective cover to open the flash drive and plug it into the USB port. - Allow the accessory to connect.
A popup will appear after you plug in the flash drive. Then, you can click Allow and your flash drive will be connected.
How to format a flash drive on Mac
You should format your flash drive before using it on a Mac to ensure it’s compatible. Formatting a flash drive erases all of the data on the device and sets up a system that is compatible with your computer.
If you don’t format your flash drive, you might find that it has file size limitations, performance deficits, or doesn’t work at all. And if you want to secure your files on your drive, check out our dedicated article to encrypting a flash drive.
Once you've backed up existing data, follow the steps below to ensure your flash drive will work with your device:
1. Select the Finder app.
Find and open the Finder app (it looks like a smiley face with blue on the left side and white on the right). If you can’t find it in your dock, type “Finder” into the Launchpad.
2. Click the Applications tab in the Finder app.
When you open the Finder app, you’ll see the Applications button and a small icon that looks like an “A” in the left panel. Once you find it, click it.
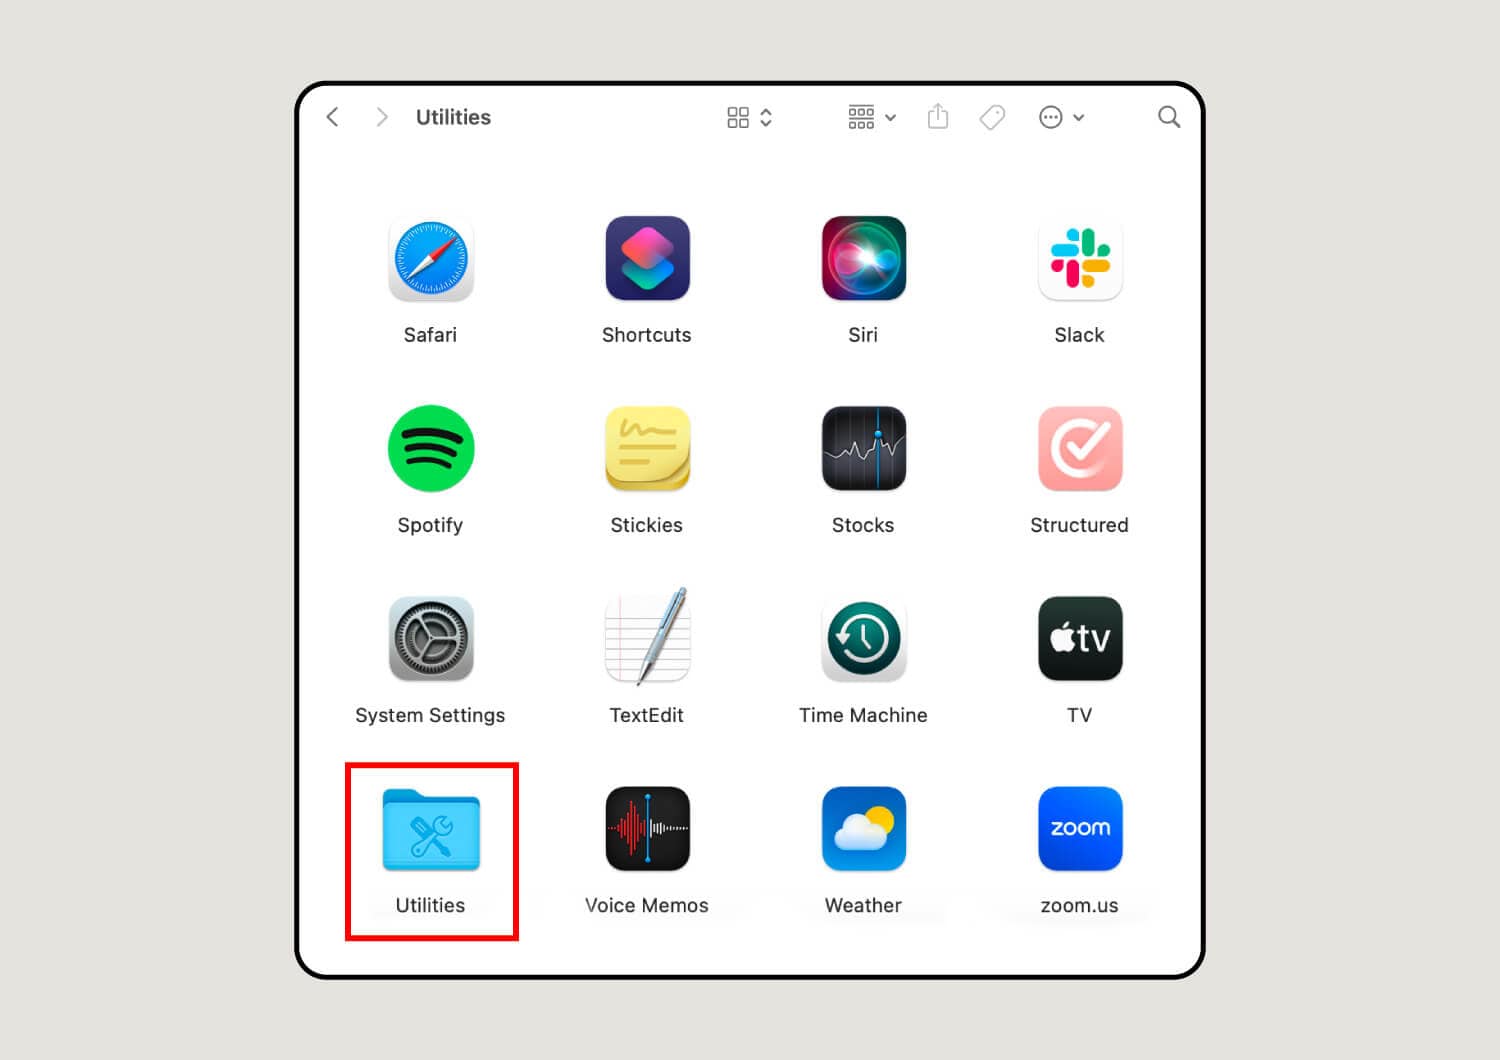
3. Open the Utilities folder.
This screen looks different for everybody since it’s a catalog of your Mac’s applications. Though you may not have all the apps shown below, you will have the Utilities icon, which looks like a blue manilla folder with a wrench and screwdriver forming the shape of an "X.”
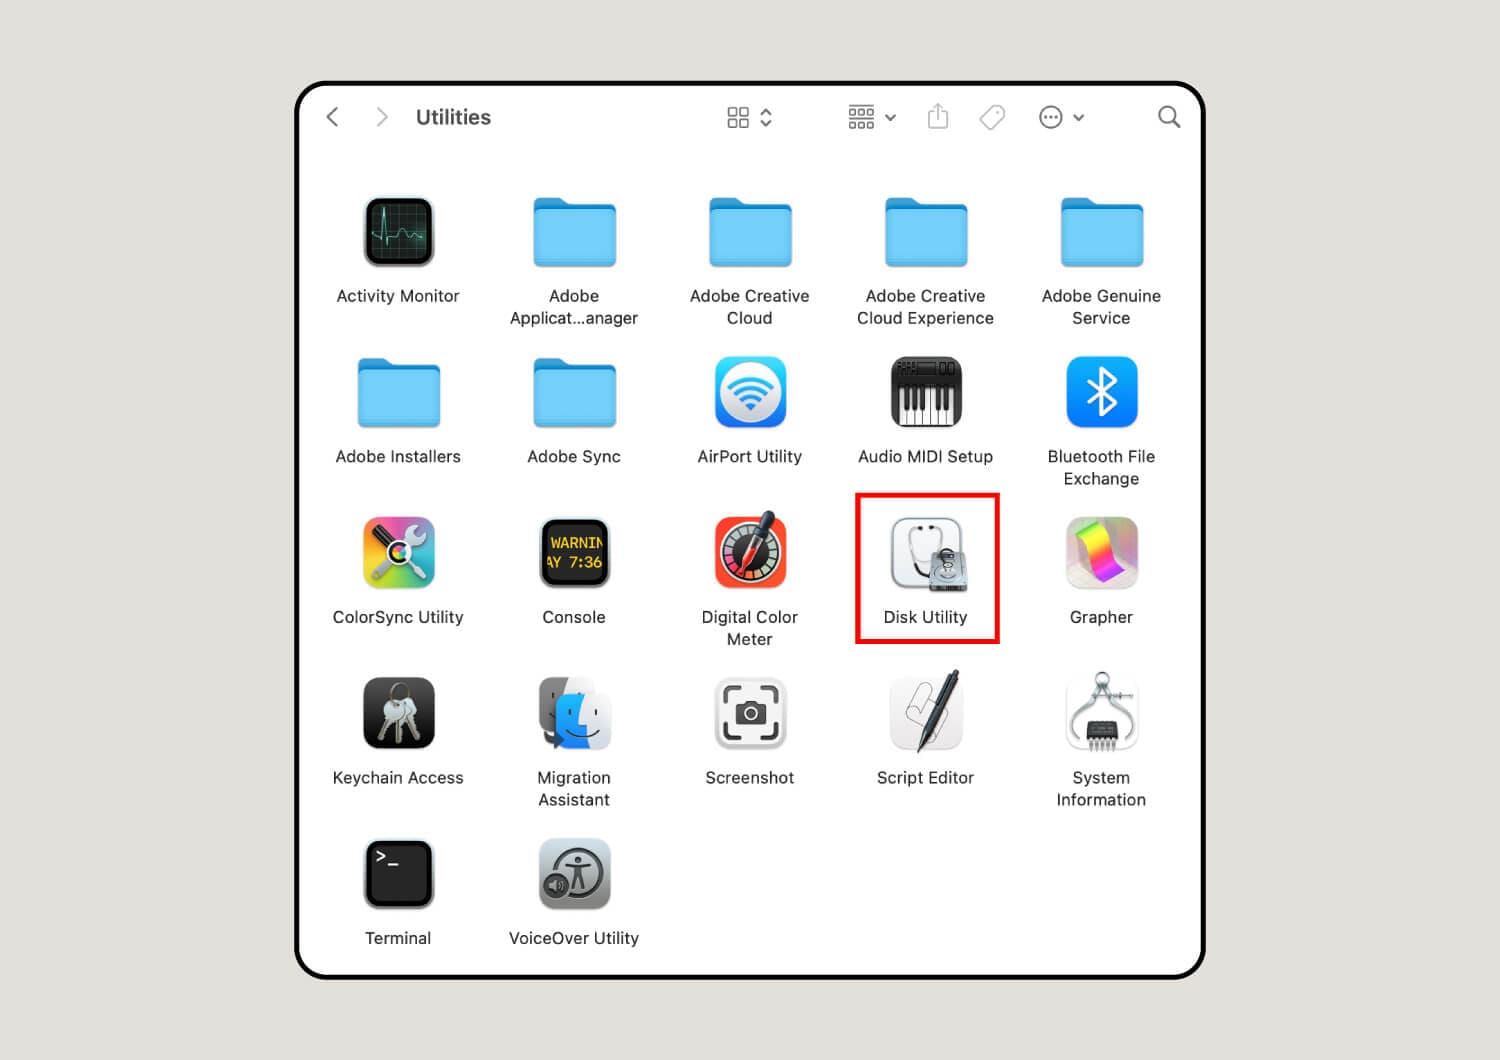
4. Click Disk Utility.
Scroll down until you see Disk Utility and click it.
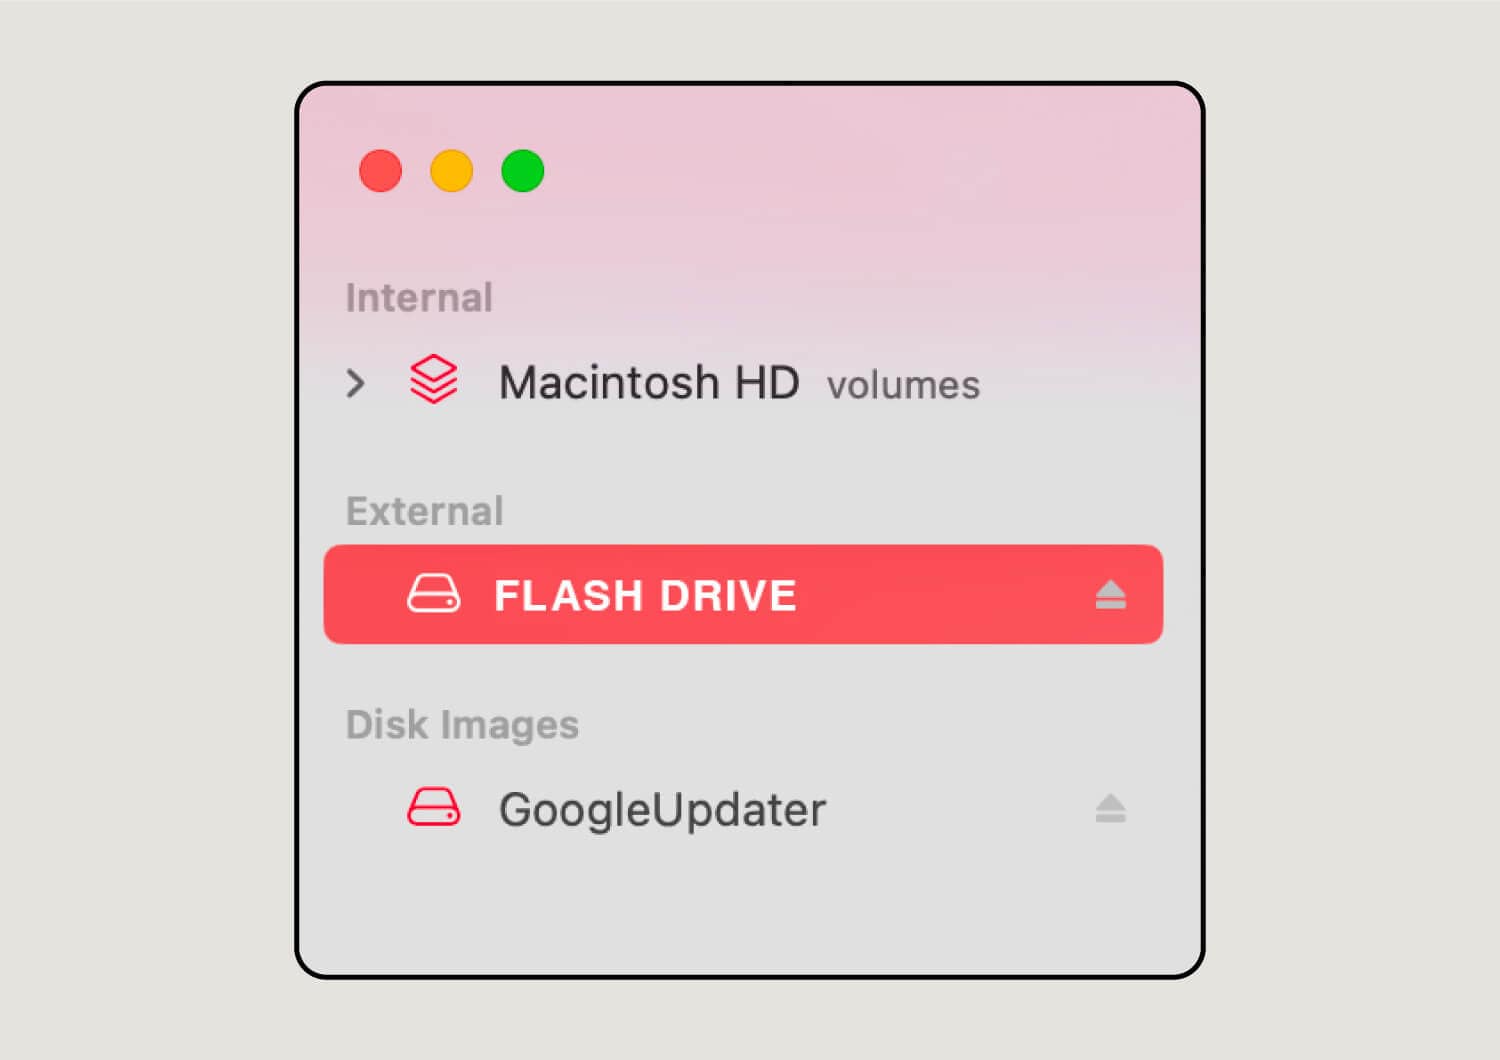
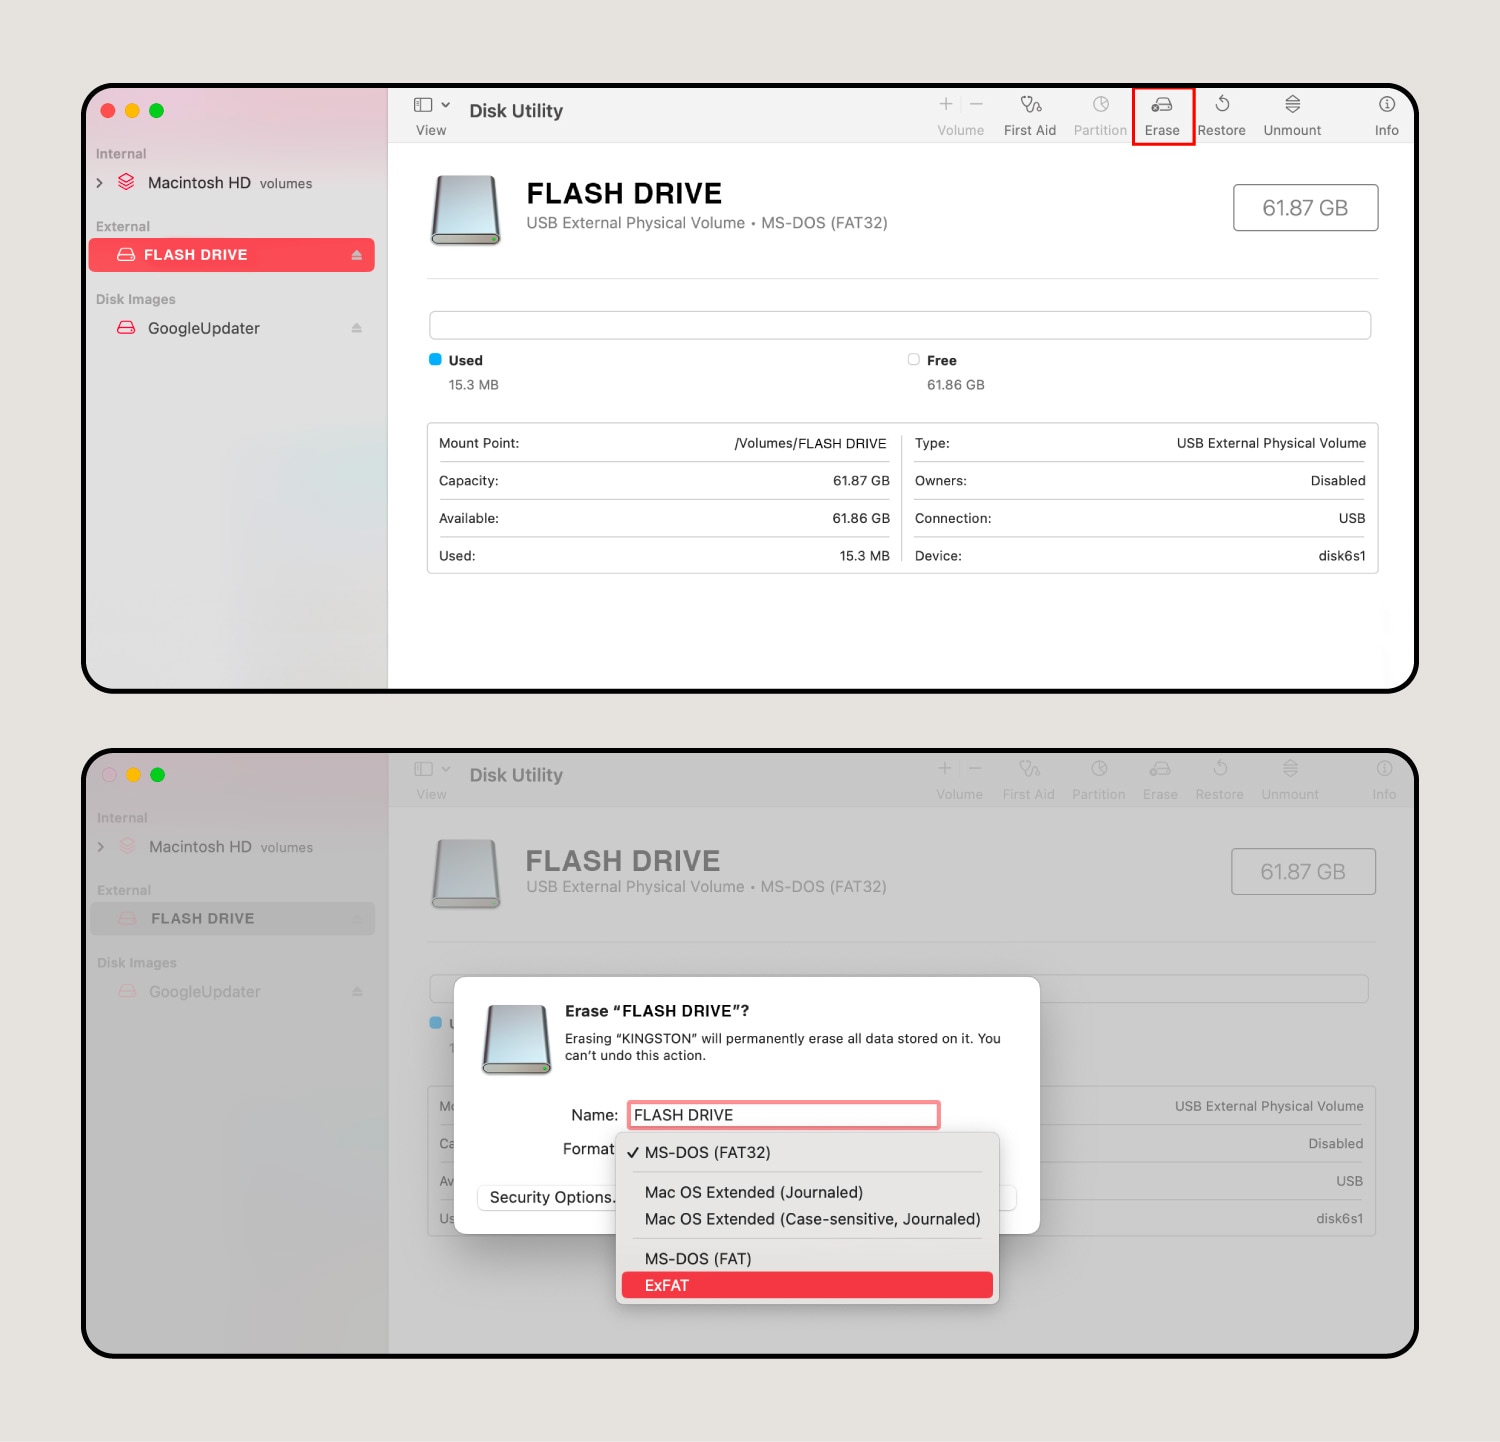
5. Find your flash drive under External.
Select your flash drive from the list of external devices in the left panel.
6. Click Erase at the top of the window.
After you click Erase, a pop-up window will appear, prompting you to name and format the device. You can pick whatever name you want, but you should change the flash drive format to exFAT since that works best with the Mac operating system (macOS).
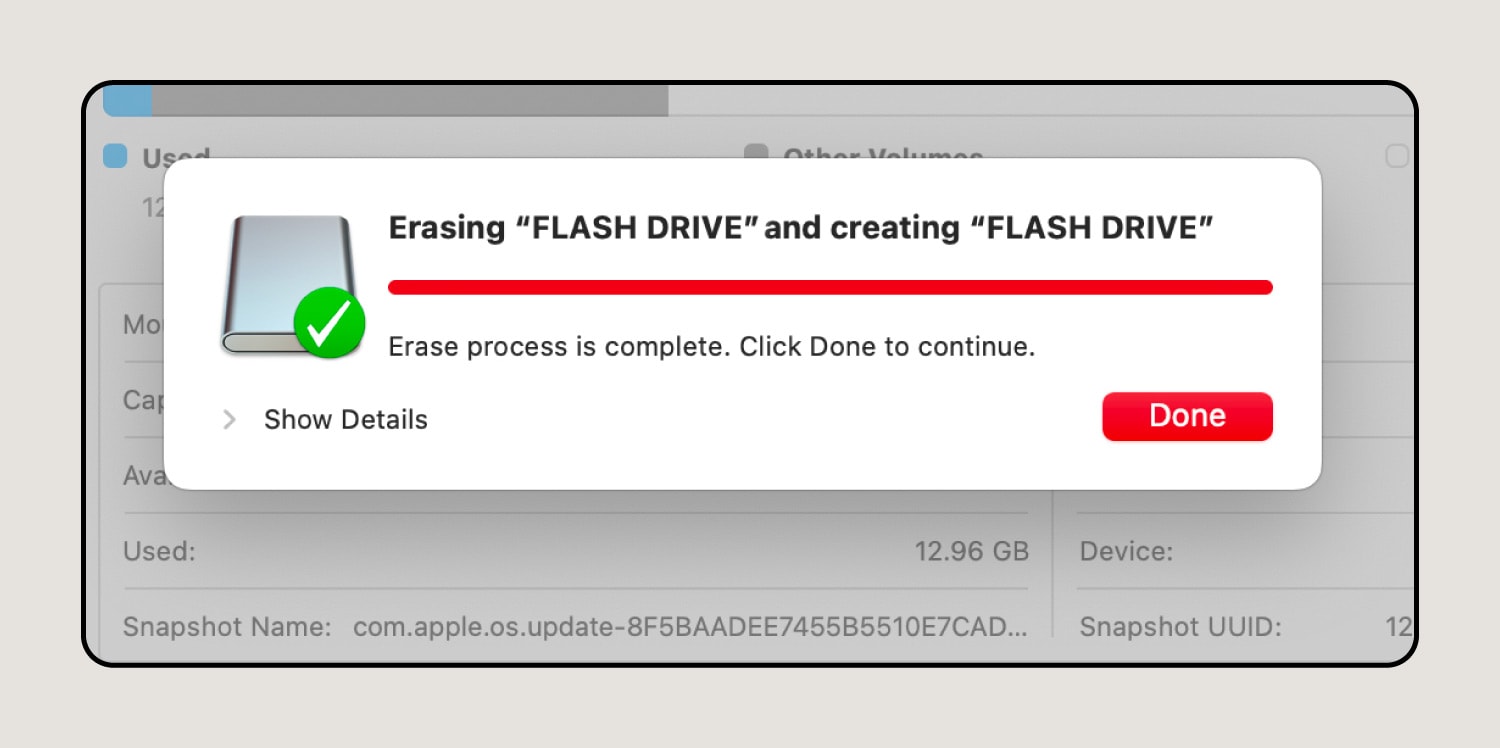
7. Complete the formatting process.
After you choose a new format for your hard drive, hit Erase again. Then, the computer will finalize the formatting process, and you can click Done when it’s ready.
How to manage files on a flash drive on Mac
Discover how you can add, move, and delete files on your flash drive without breaking a sweat. Just follow along with the steps below:
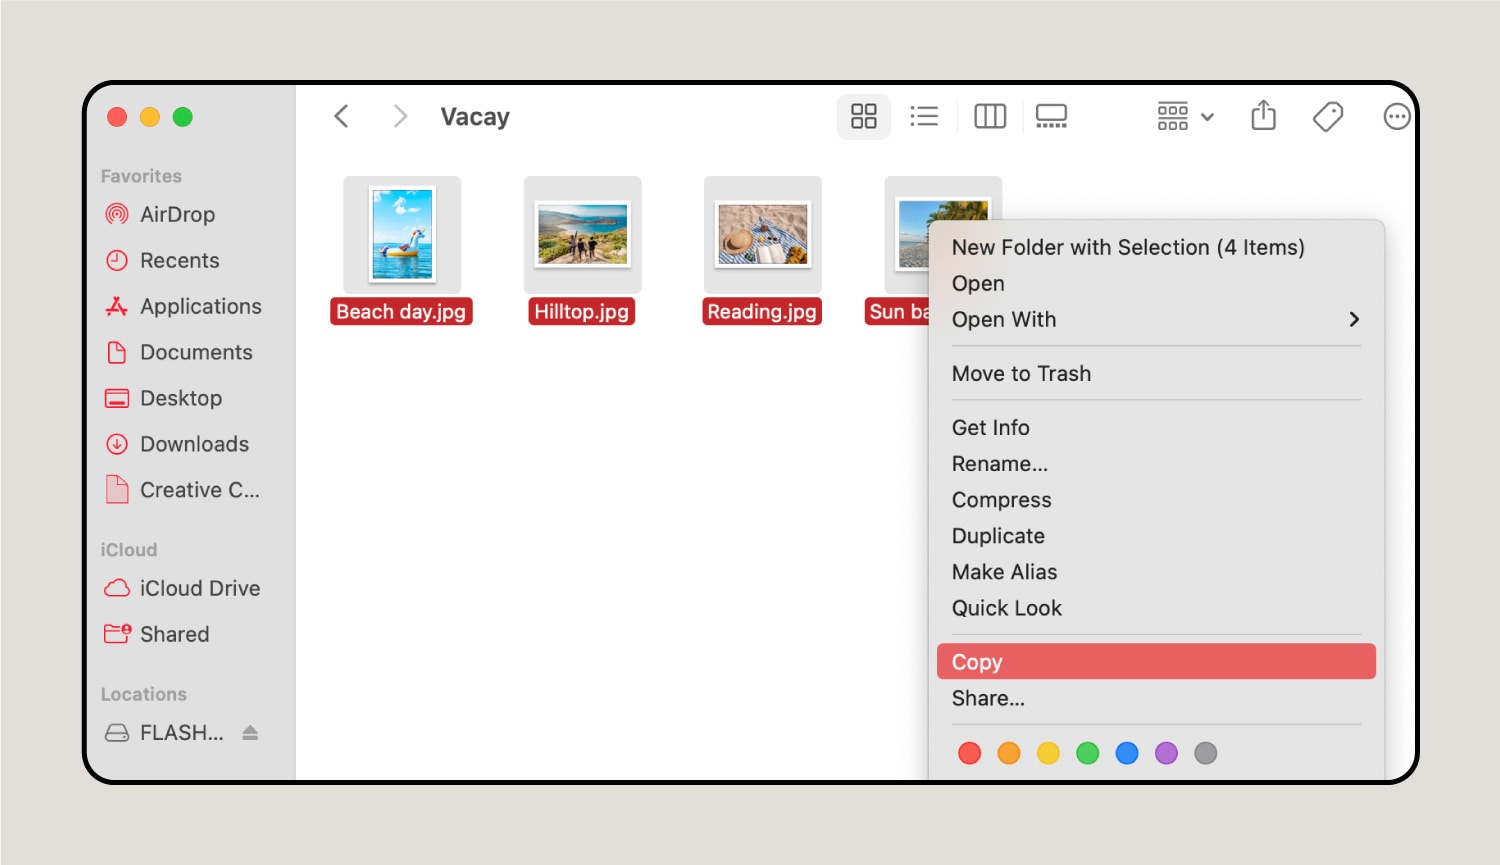
1. Find the files.
You can select an entire folder to move onto the flash drive, or open a folder to grab a specific file. Once you’ve selected all the files, push the touchpad (on your MacBook) with two fingers or right-click (on your iMac) and click Copy.
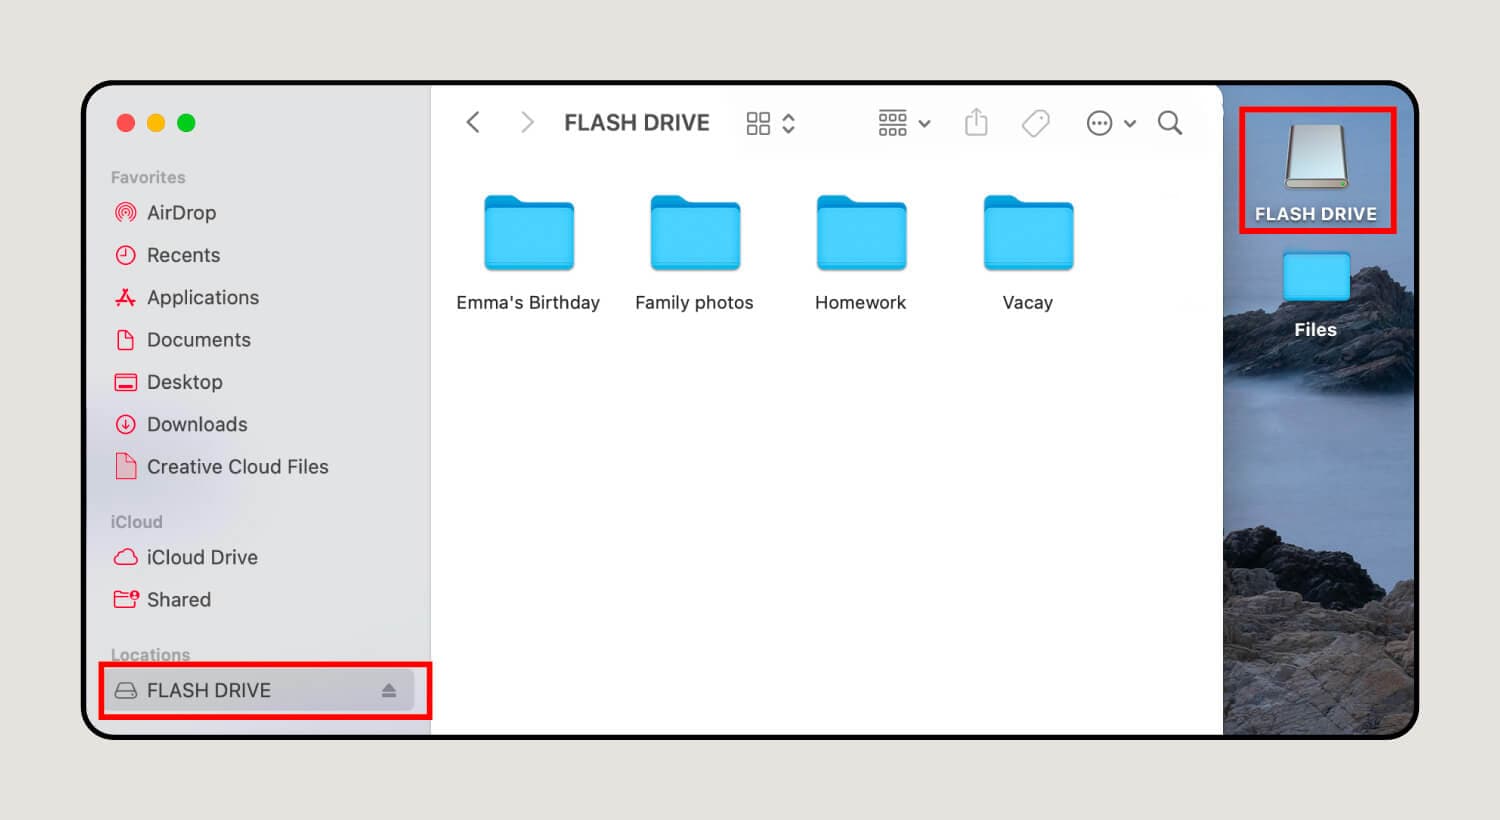
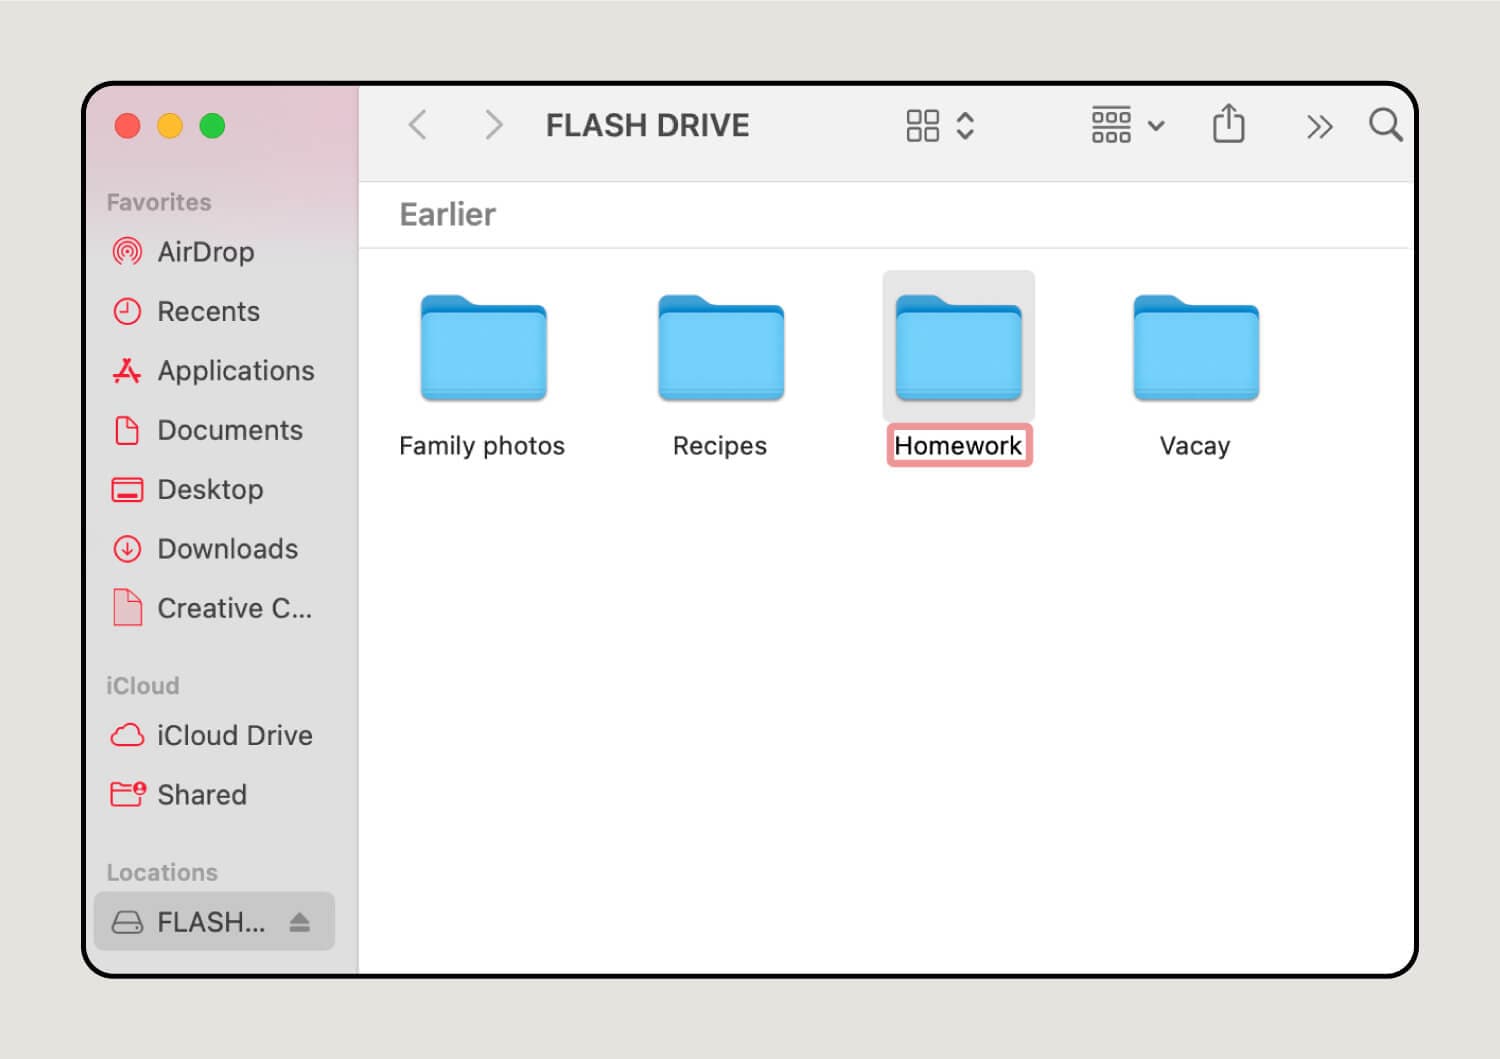
2. Find the flash drive on your desktop or in Finder.
Push the touchpad with two fingers or right-click and select Paste Item (or Paste [Number] items if you’re copying multiple files).
3. Move files as needed.
You can move files by opening the flash drive from the desktop or through Finder. If you need to access files from different locations, you can open as many other Finder windows as necessary. Here’s how:.
- Open Finder.
- Click File in the navigation bar at the top of the screen.
- Click New Finder Window.
Once you can see all your files, it’s just a matter of dragging and dropping them where you want them.
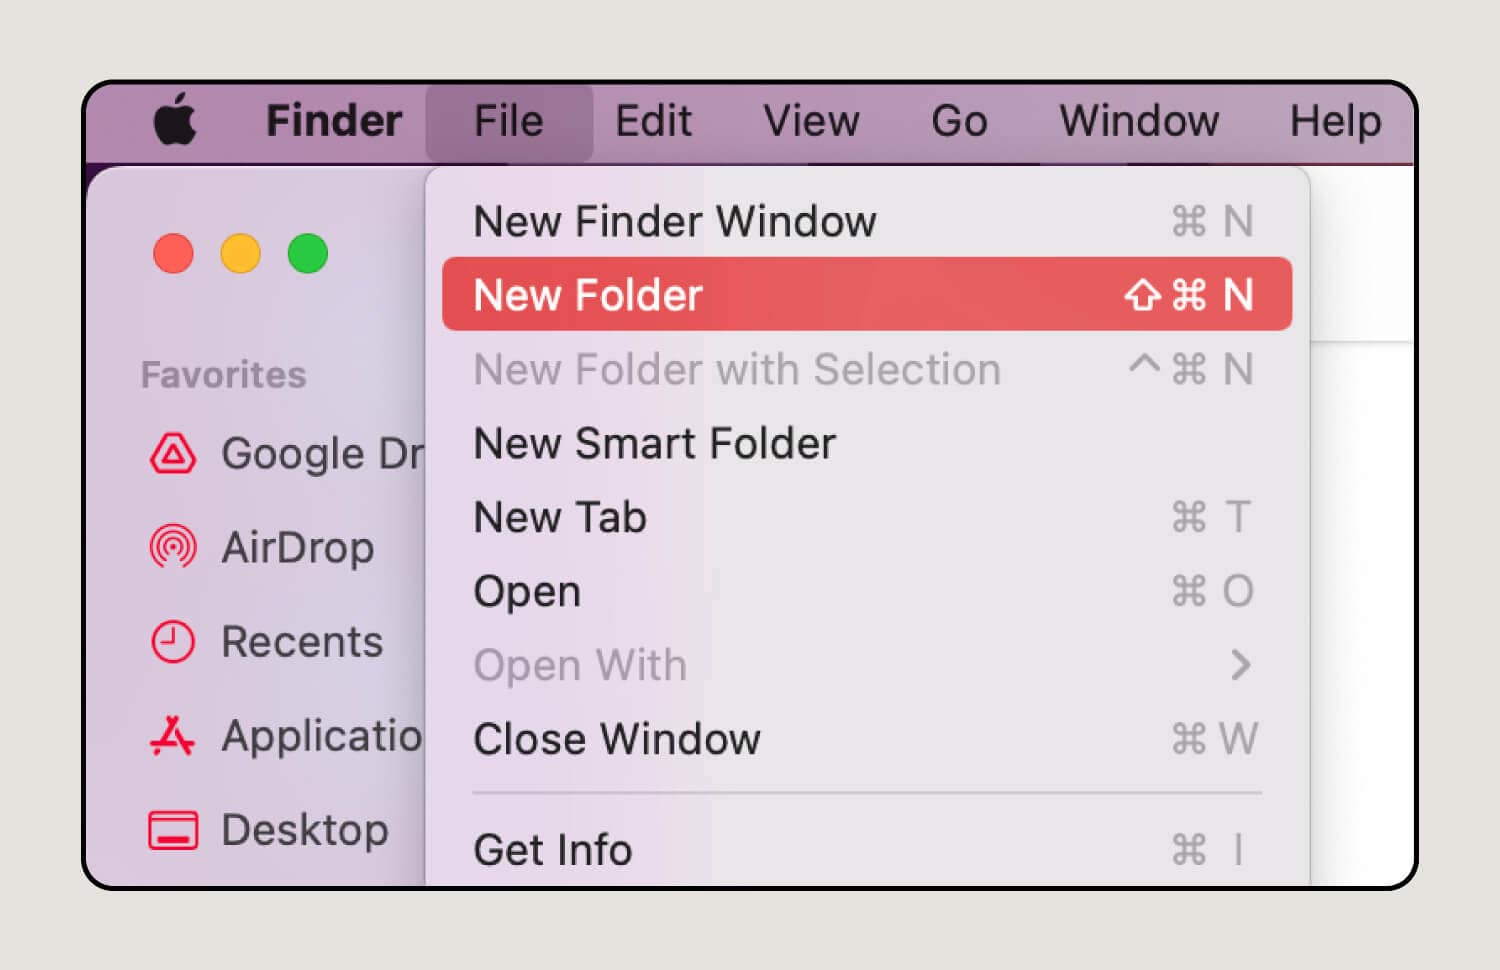
4. Add new files or folders.
If you need to create a new folder, select File. This will open a drop-down menu where you can find and click on New Folder.
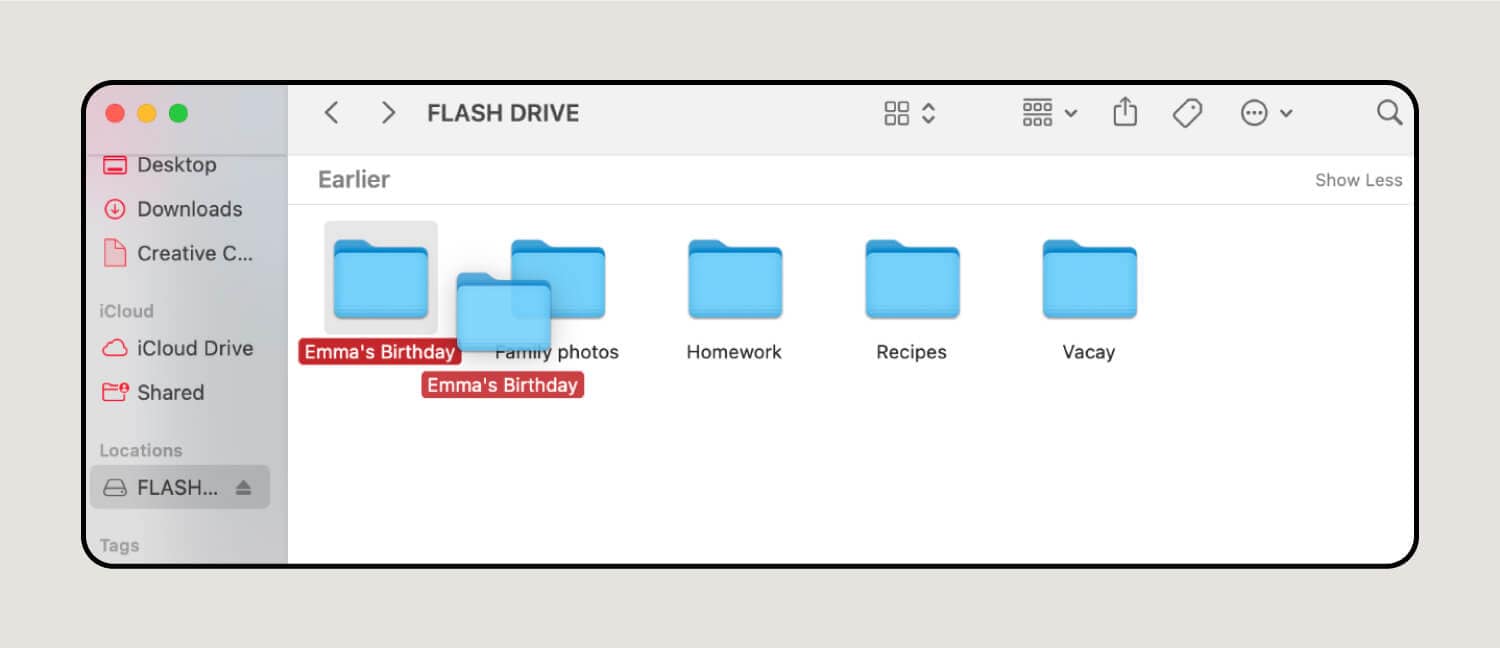
5. Rename new files or folders.
Enter a label in the opaque red box. When you’re done, click anywhere on the page to finalize it. You can change the file name later by right-clicking or clicking the touchpad with two fingers, then choose Rename.
How to safely remove a flash drive on Mac
To safely remove a flash drive, you need to find the device on your desktop or in Finder and check to make sure it’s done copying files. If all the files are in the correct location, you can remove your flash drive in one of two ways::
- Eject your flash drive from the desktop. You can eject your flash drive from your desktop by dragging the icon over the trash can at the bottom of the screen. The trash icon will change to a rectangle with a triangle pointing upward, meaning “eject”. After the computer successfully ejects it, the icon will disappear from your desktop and you can remove your flash drive.
- Eject your flash drive from Finder. In Finder, look for the device in the left panel under Locations. Then, click the triangle and rectangle icon to the right of the flash drive’s name. If the thumb drive ejects correctly, it will vanish from the list of devices and you can safely remove your flash drive.
If you plug in your flash drive and get a notification that says it’s corrupt or unreadable, chances are that something damaged it. Most commonly, this happens when you pull out the flash drive without properly ejecting it, but there are plenty of other causes, too.
The good news is that not all is necessarily lost. Here’s how to recover a corrupted flash drive:
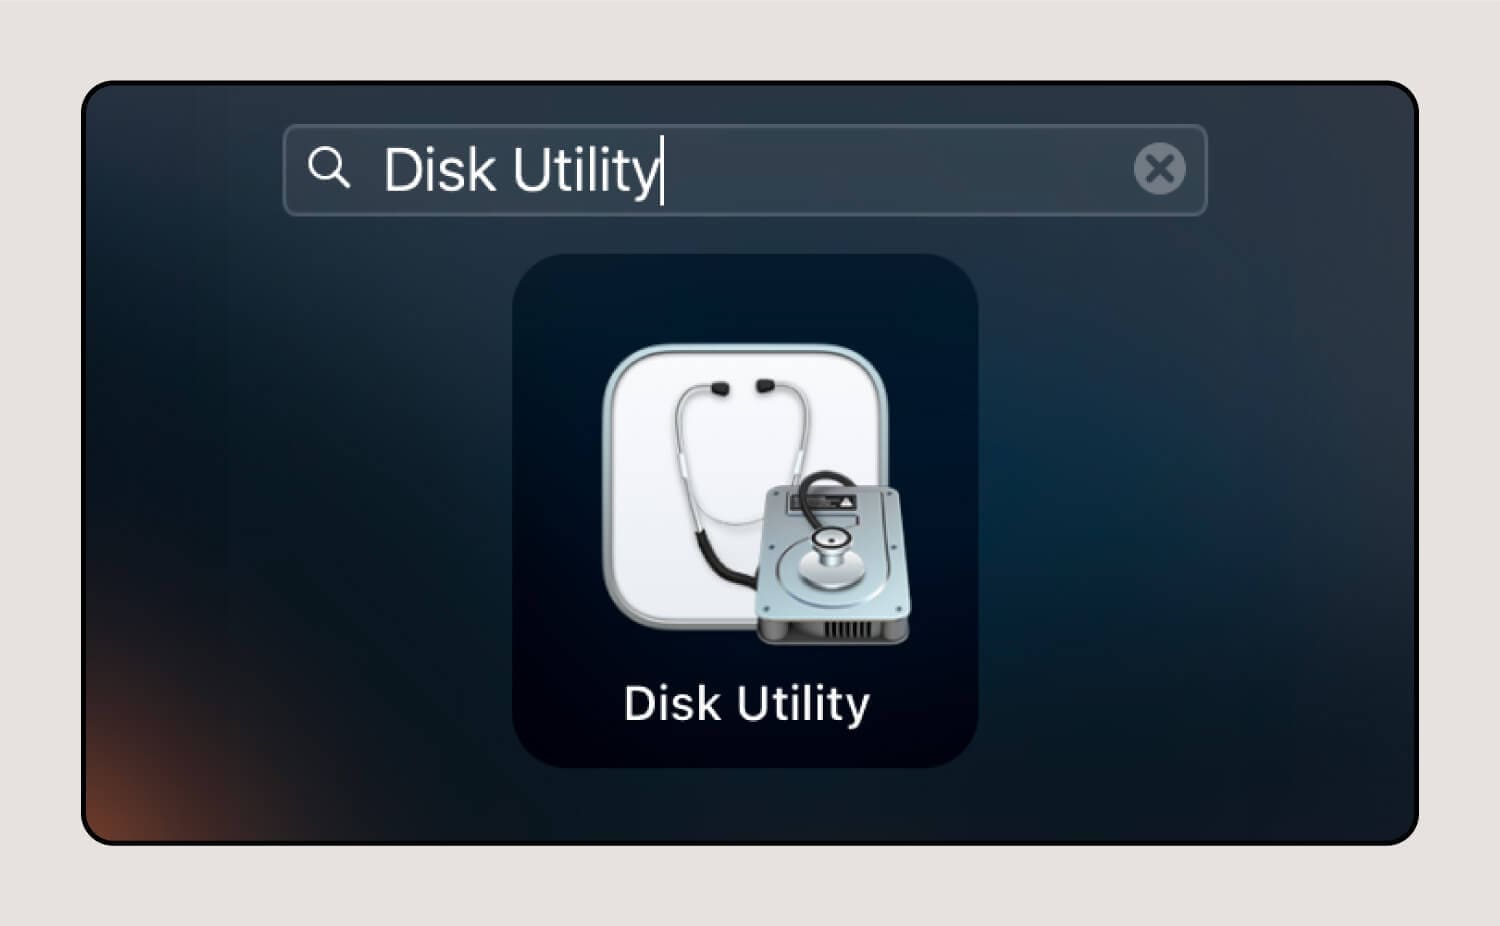
1. Open the Launchpad and search for Disk Utility.
Type Disk Utility into Launchpad’s search bar and hit Enter.
2. Use the First Aid feature to recover your corrupted flash drive.
Click First Aid to begin the flash drive repair process. Once you do, a pop-up window will appear. Click Run to start the troubleshooting program.
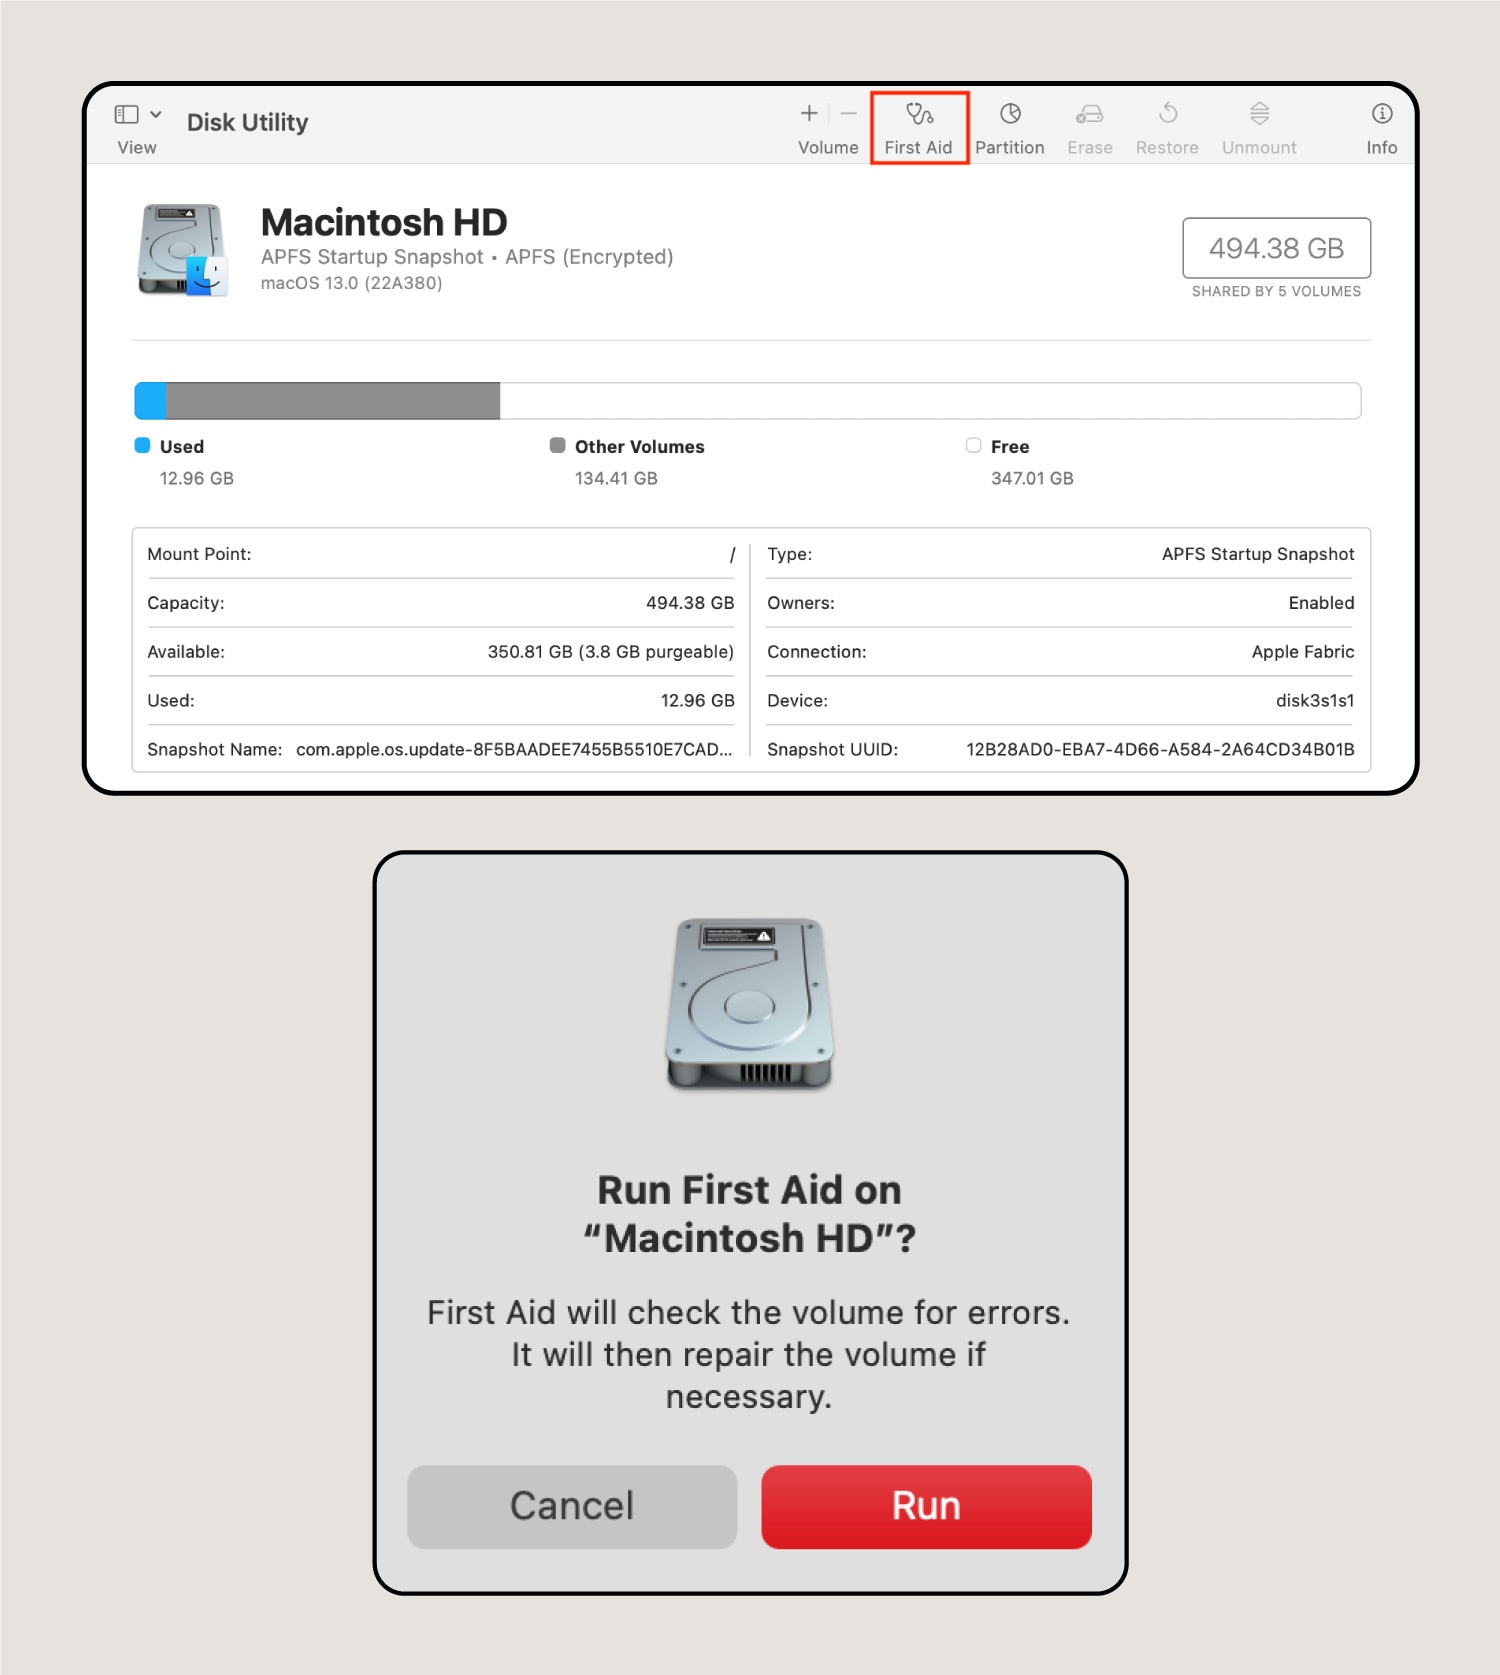
3. Finalize the flash drive recovery process.
After it finishes, click Done. Often, this will fix the issue without any data loss. However, there are no guarantees. If you’re worried about losing important files or the recovery process doesn’t work, consult a tech repair specialist.
How to use a flash drive on Windows
It can be a little trickier to use a flash drive on Windows than on Mac. This is because so many different computer companies use the operating system, each using slightly different processes. Aside from that, some users are still on Windows 10, while others have upgraded to Windows 11.
We’ll tell you more about the general steps to connect, format, use, remove, and recover a flash drive on a PC. Contact the manufacturer’s customer service team for customized assistance if you have any other questions.
How to connect a flash drive on Windows
It’s easy to connect a flash drive on PC devices. However, loading can take a while, especially if your computer needs to download a separate driver to process the request. Here’s how to connect a flash drive on Windows:
- Find the USB port and insert the flash drive.
You can usually find the USB port on the side of your laptop. Or, if you have a desktop computer, check the front and back of the computer tower for USB ports. - Plug in the flash drive.
Most Windows devices have the standard USB-A port, so you can insert the flash drive without help from an adapter. However, this means you can only plug the flash drive in if it’s facing in the right direction. So, stop and flip the flash drive around if you feel any resistance. - Check to make sure your device recognizes the flash drive.
Most devices with a Windows operating system will automatically recognize the flash drive and show a notification in the bottom right corner. But if it doesn’t, or if you disabled autoplay notifications, press and hold the Win + E keys simultaneously to find the device in File Explorer.
How to format a flash drive on Windows
It’s important to format a flash drive before you use it to ensure that it functions correctly and is compatible with your device. In most cases, this also helps free up space on the thumb drive. Read the instructions below to find out how to format a flash drive for PC use after you back up existing data on the device:
1. Insert the flash drive into the USB port.
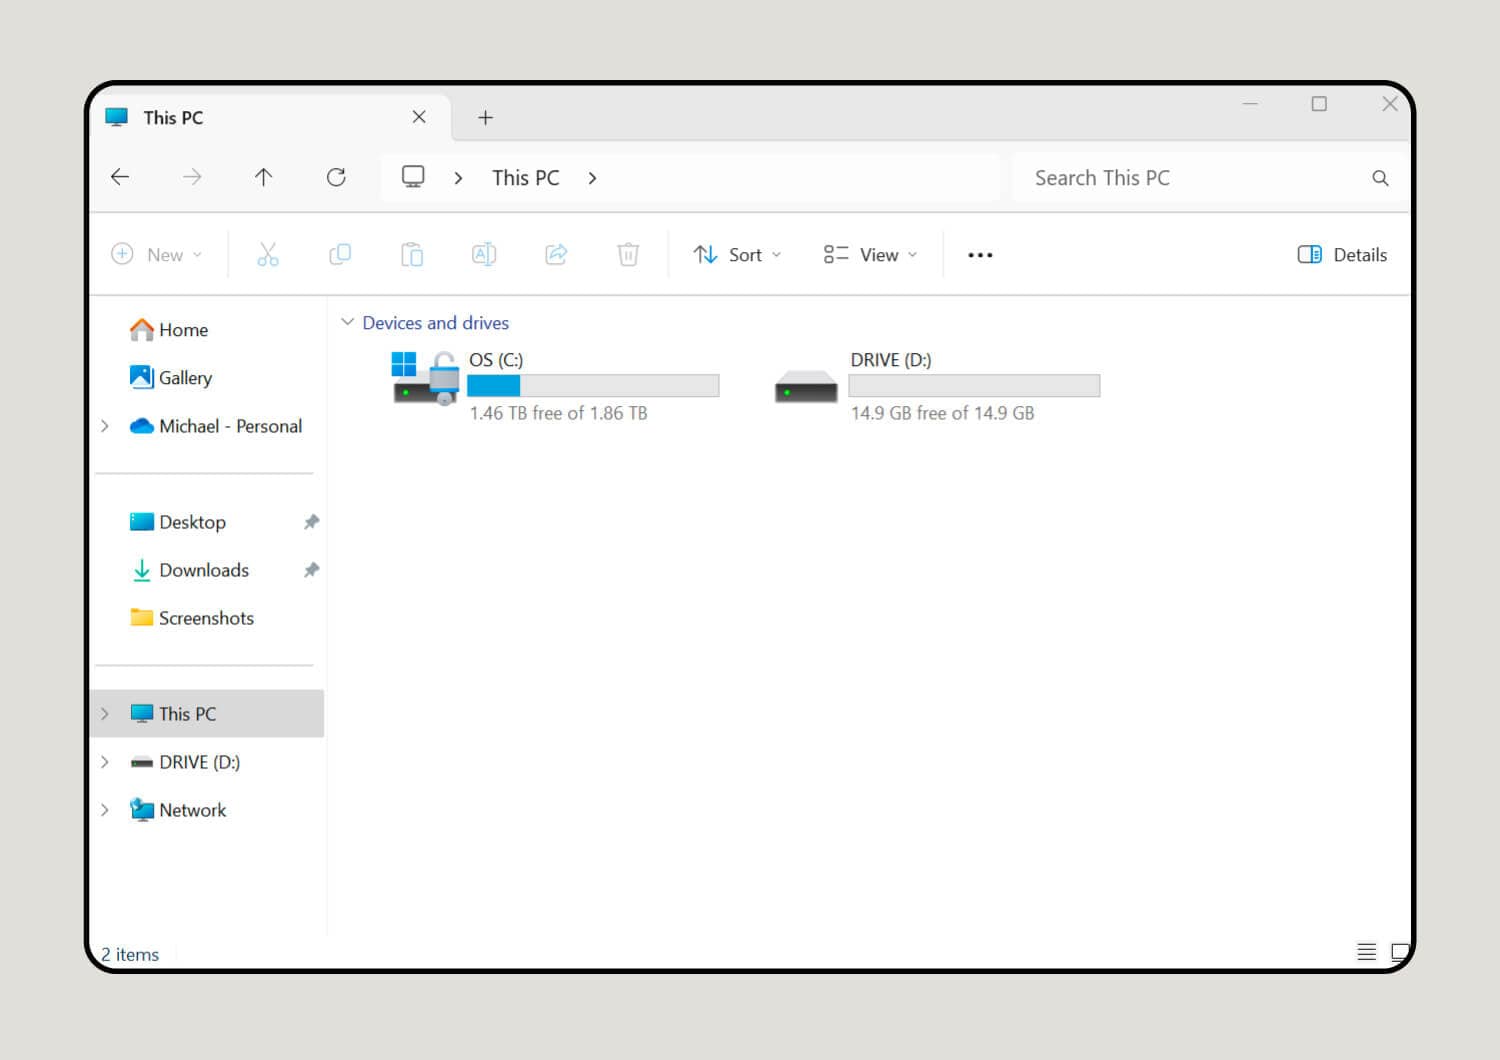
Open File Explorer and click This PC in the left pane. This will lead you to a new window where you can find the flash drive under Devices and drives.
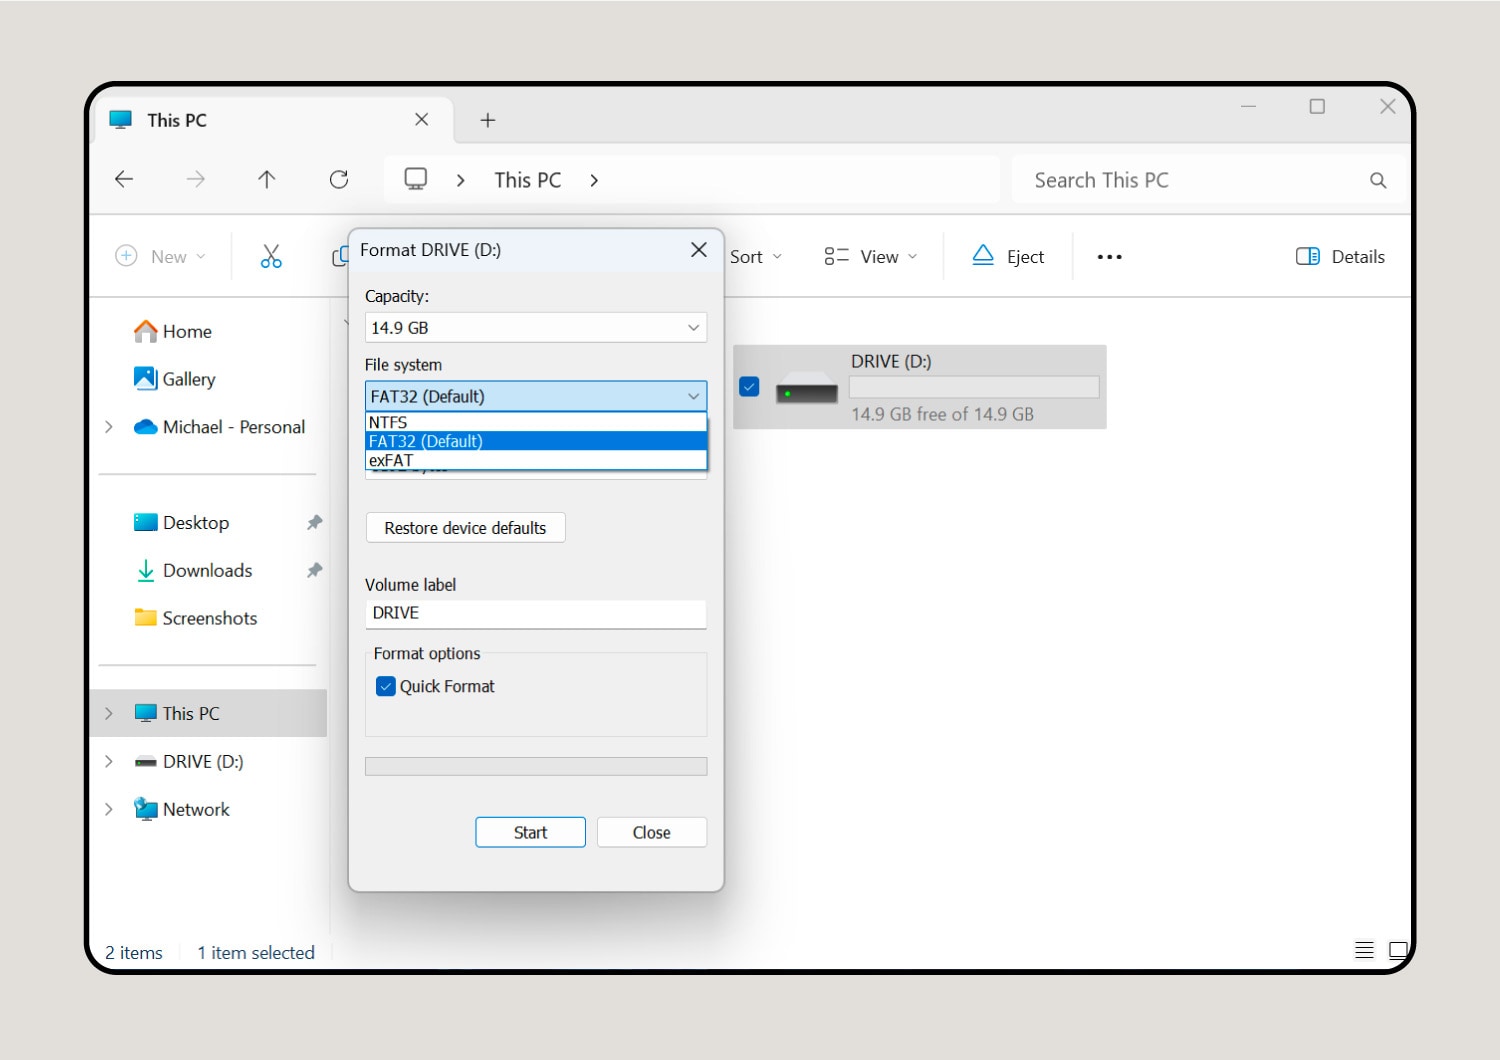
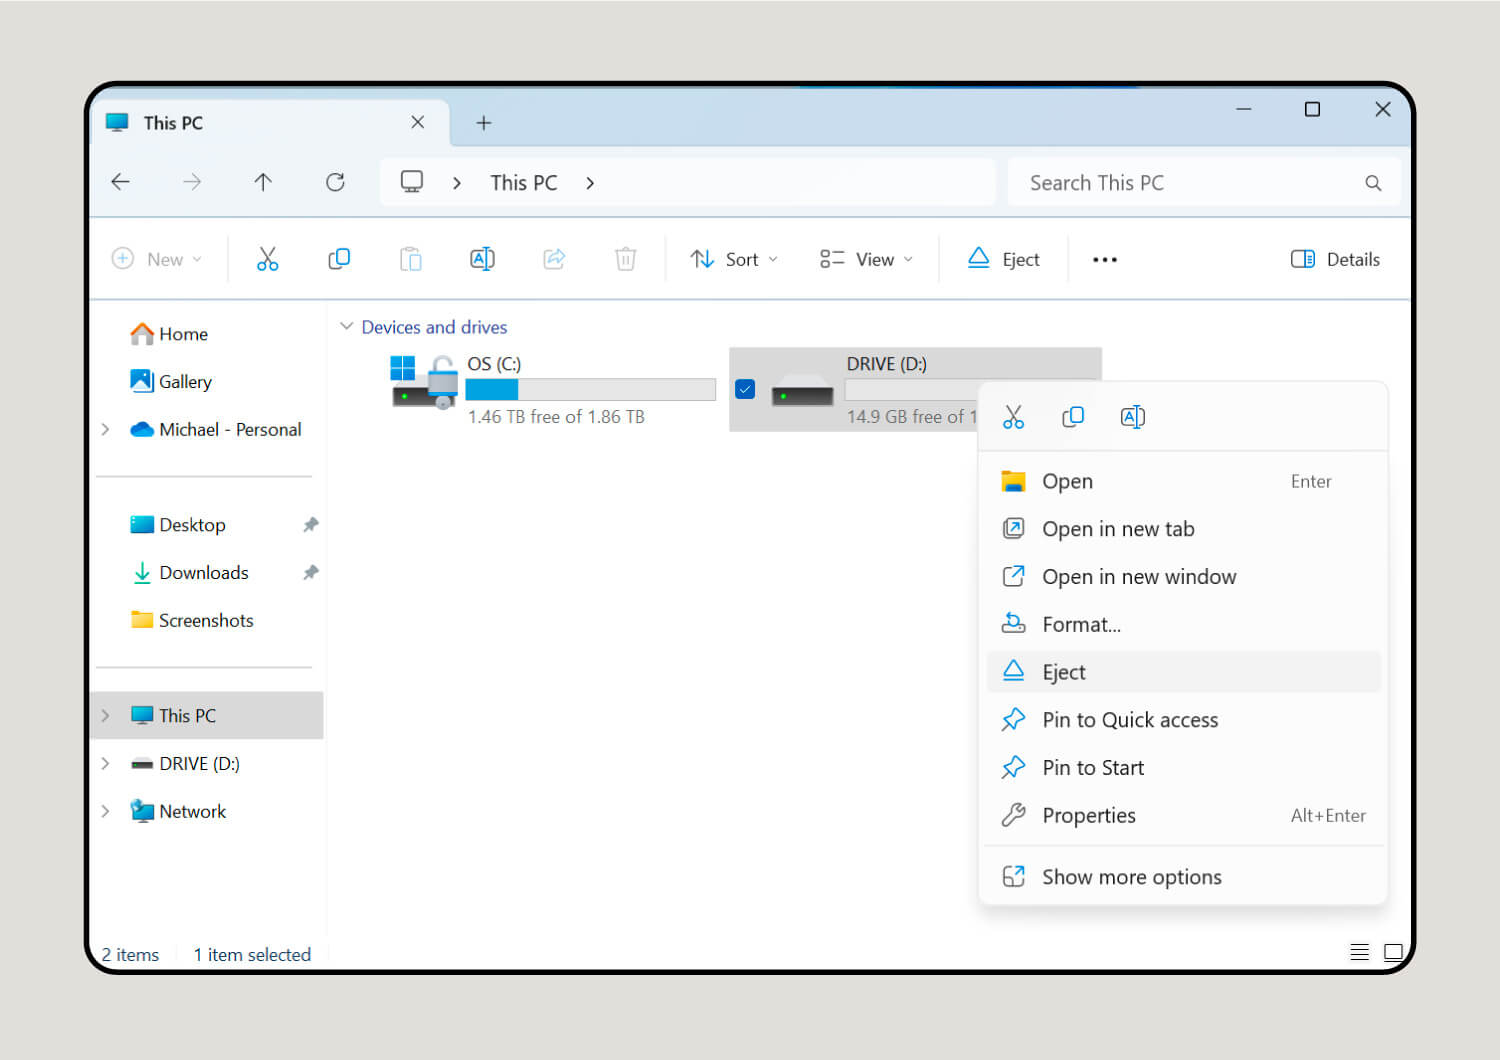
2. Right-click the flash drive to format it.
After you click the flash drive and select Format, navigate to the File system drop-down menu to select a format.
3. Choose the flash drive format that works best for your device.
In most cases, you can choose the NTFS format option. But you should opt for FAT32 if you also plan to use the flash drive on a Linux system.
How to manage files on a flash drive on Windows
Now, let’s look at how to get the most out of your flash drive. Here’s what you need to know about adding files to your flash drive, moving them around, and deleting them:
1. Find the flash drive on your PC.
Before you start, check to make sure the device is showing up on your PC. Do this by clicking on This PC in the left panel of File Explorer, and locating your flash drive icon under Devices and Drives.
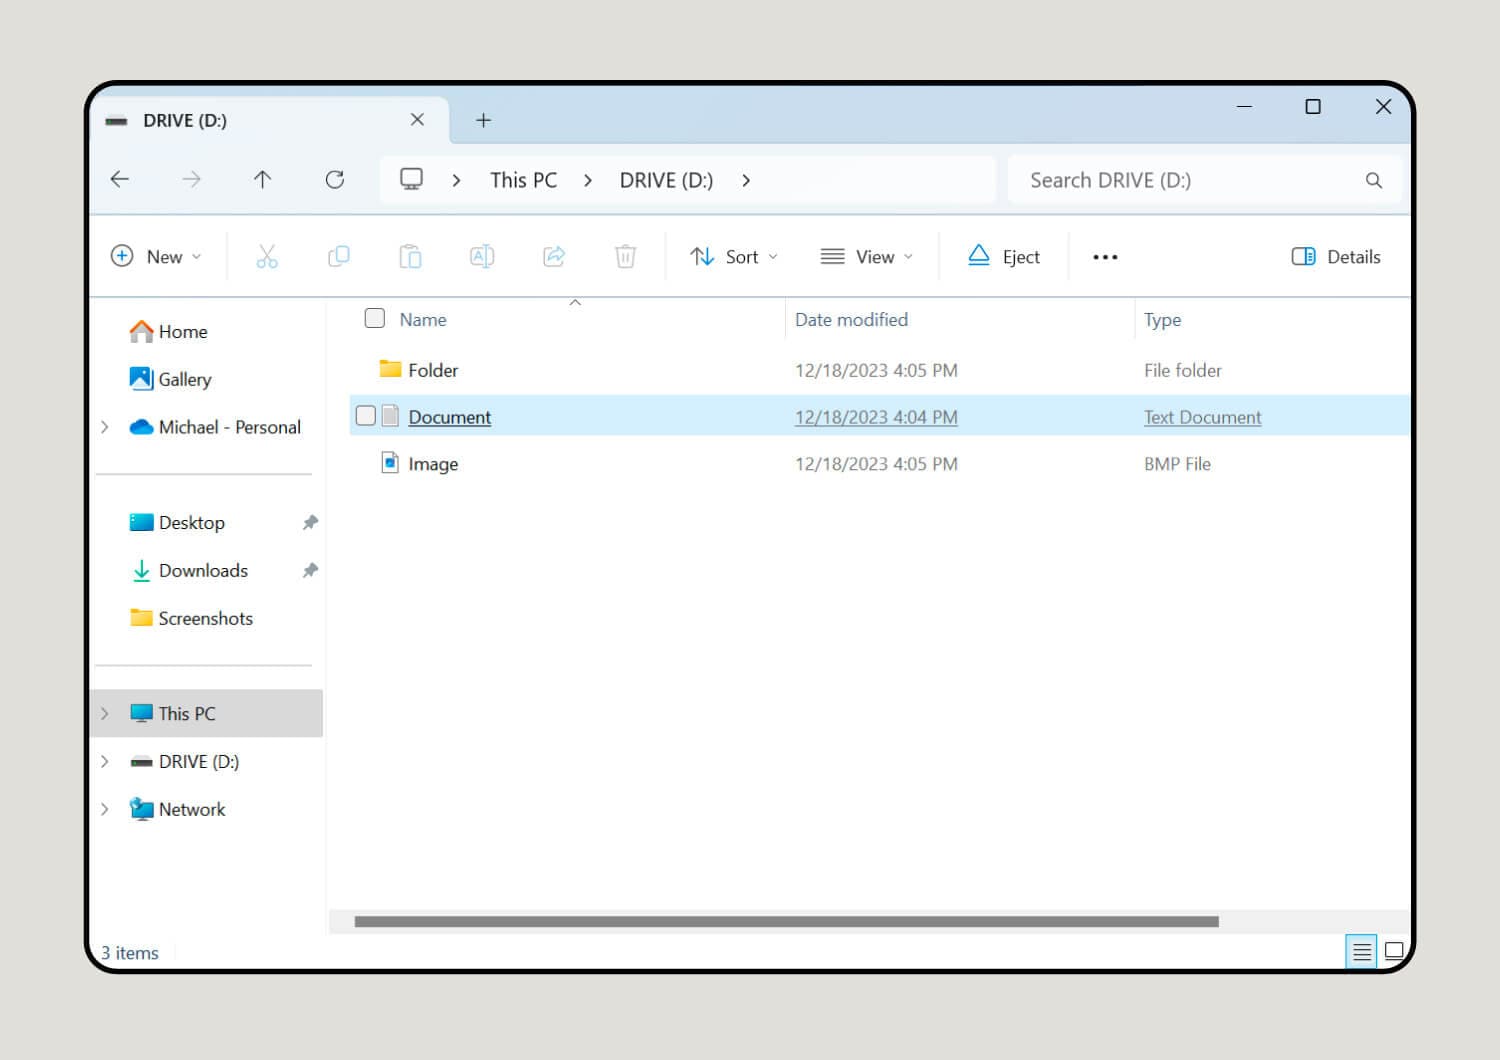
2. Click to open the flash drive.
Click on the flash drive icon. Ensure you select the correct drive since your computer’s built-in drive and other external devices will also appear here.
3. Find the files you want to copy.
Select the files, images, or documents you want to add to the memory stick. You can also organize them in folders on your computer if there are a lot.
4. Copy the files to the flash drive.
Click and drag the files (or folder) over the flash drive icon to copy them to your flash drive. If you need to view files in different places, press the Ctrl + N keys simultaneously to open a second File Explorer window.
5. Wait for the transfer to complete.
It can take several minutes to transfer large files, and unplugging the flash drive before it’s done can damage the device. Wait until it’s done processing before you remove the memory stick.
6. Delete files on your flash drive.
You can delete old or miscategorized files by right-clicking the file in your flash drive and clicking Delete. Next, a pop-up window will appear asking if you want to permanently delete the files — click Yes.
7. Move files off your flash drive.
Follow steps three and four above if you need to move files off your flash drive. Then, you can simply drag the files and drop them into the folder of your choice.
How to safely remove a flash drive on Windows
You can safely remove the flash drive without taking any extra steps if the Quick Removal feature is on. To determine if Quick Removal is enabled for a flash drive on Windows, right-click the drive, select Properties, go to the Hardware tab, choose the drive, and review the removal policy under Policies.
If it’s not enabled, you have a couple of options to remove your flash drive:
- Drag the flash drive to the trash.
Use your mouse to drag the flash drive icon from your desktop (if it appears there) to the trash can. - Click to eject the flash drive.
Right-click the flash drive icon on the desktop, in File Explorer, or in the Taskbar and click Eject.
How to fix a corrupted flash drive on Windows
The easiest way to fix a corrupted flash drive is through File Explorer. Here’s how you do it:
- Locate the flash drive.
Navigate to File Explorer by clicking on the app or using the Win + E shortcut. Find the flash drive under Devices and drives and right-click it. - Begin the corruption repair process.
Select Properties, go to the Tools tab, and click the Check button under the Error-checking section. - Finalize the repair.
Follow the on-screen instructions to complete the recovery process.
If your flash drive still isn’t working after you follow these steps, ask an expert for help. A trained professional can help you identify hardware issues, suggest third-party flash drive recovery tools, or try more advanced solutions.
Flash drives aren’t your only option for keeping data secure
Backing up important files, photos, and documents can help you recover from hacking attempts. But it’s better to avoid cyberthreats altogether. Norton AntiVirus Plus can provide an extra layer of protection by shielding your devices from hackers, standing guard against viruses in real-time, and securely backing up your data in the Cloud.
FAQs about using flash drives
Still have questions about using flash drives? Well, we might have answers.
What will happen if I don’t eject a flash drive before removing it?
Removing a flash drive before ejecting it can lead to data corruption and even damage the device. Ejecting the flash drive is essentially a fail-safe that stops you from interrupting important processes, allowing you to safely remove it from your computer.
Can I recover deleted files from my flash drive?
It’s usually possible to get the flash drive back in working order after a performance issue. But it’s harder to recover deleted files — it may even be impossible if new data overwrites the deleted files. You can try to restore your flash drive on Mac and Windows, but if it doesn’t work, consult a professional.
How can I transfer the files on my flash drive to a smart device?
You will usually need a USB OTG (On-The-Go) to transfer devices like a phone or tablet to a smart device. The USB OTG is an adapter that plugs into the device’s charging port and allows you to access files.
Editors' note: Our articles offer educational information and are written to raise awareness about important topics in Cyber Safety. Norton products and services may not protect against every type of threat, fraud, or crime we write about. For more details about how we research, write, and review our articles, see our Editorial Policy.


Want more?
Follow us for all the latest news, tips, and updates.